Unreal Engine: Understanding TexCoord and Flowmaps
One of the more mysterious elements in the Unreal Engine material graph is the TexCoord node.
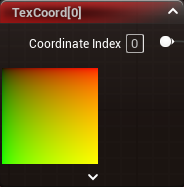
Before working on my rivergen project, I had some general understanding that this node has something to do with UV mapping, and I accepted the fact that you can do various mathematical operations on the data to get some interesting results such as scaling or panning a texture. However, the specific details of how this node works always felt a little fuzzy. What data is actually flowing out of that output pin? What do the coordinate colors mean? It always felt like something I should definitely do a deep dive on… later.
Well friends, later is TODAY.
Supplemental Study
In this blog post, I make some references to stages of the graphics pipeline. Instead of providing an overview myself- I’d like to point you to the same video I watched for understanding the basics of the graphics pipeline: Ben Cloward: Shader Graph Basics - Episode 2. Ben does a great job at explaining the fundamental concepts.
A quick refresher on UV mapping
UVs refer to the 2 dimensional representation of a 3d object’s surface. UV mapping is the act of transforming the coordinates of an object’s vertices from 3d space to 2d (UV) space. You can imagine UV space as a 2d grid that stretches infinitely in all directions. Technically, an object can be mapped anywhere on this grid, but frequently objects are constrained to the u1v1 space.
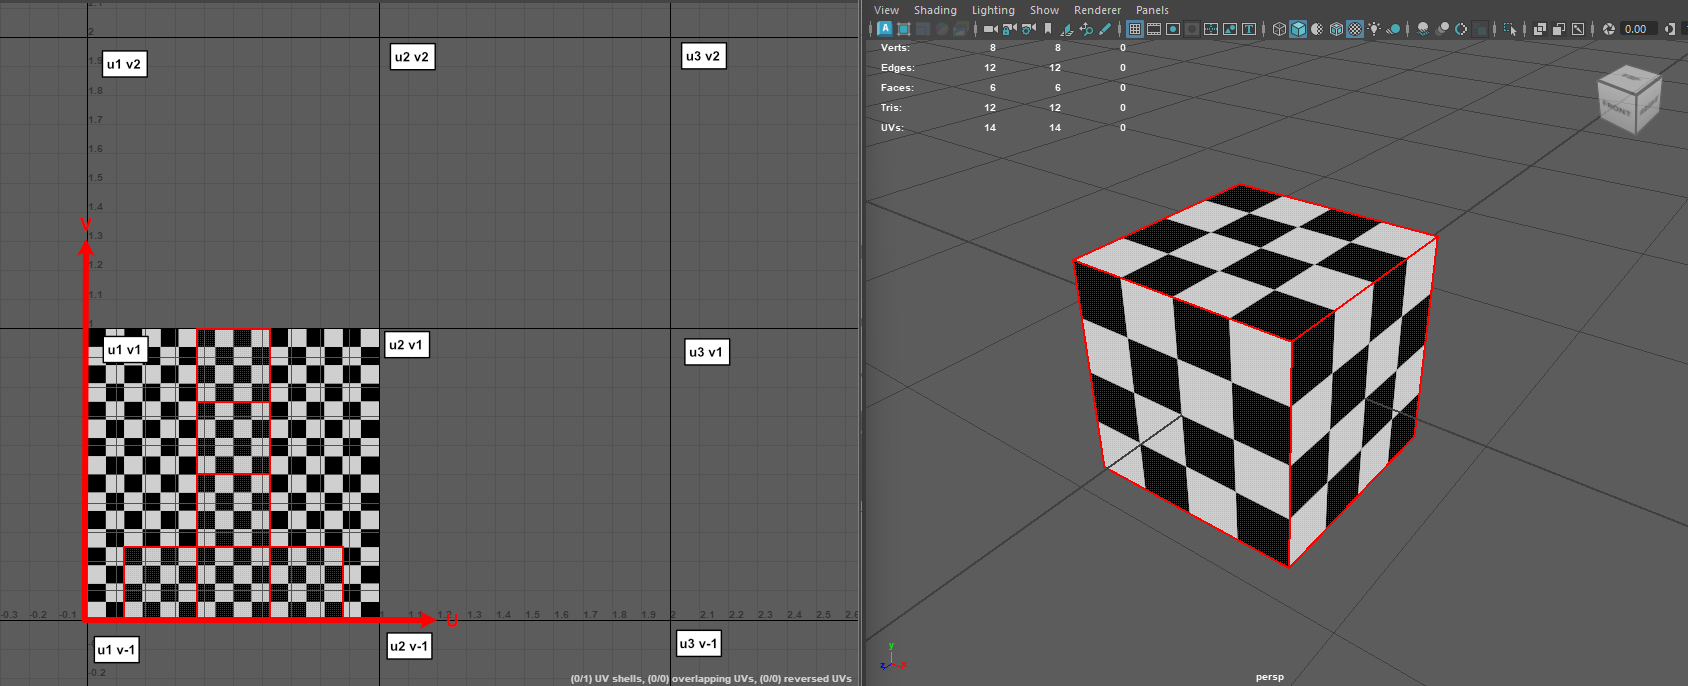
Tip: A handy way to remember which direction is which:
- V = Vertical
UV Coordinate Data
UV coordinate data is what actually maps an object from 3d space to UV space. Fundamentally, UV data is just a pair of floats (u, v) that are attached to each vertex. That’s it… sort of. You may have noticed that for many vertices, they actually exist at multiple points in 2d space. For example, the point selected in the image below:
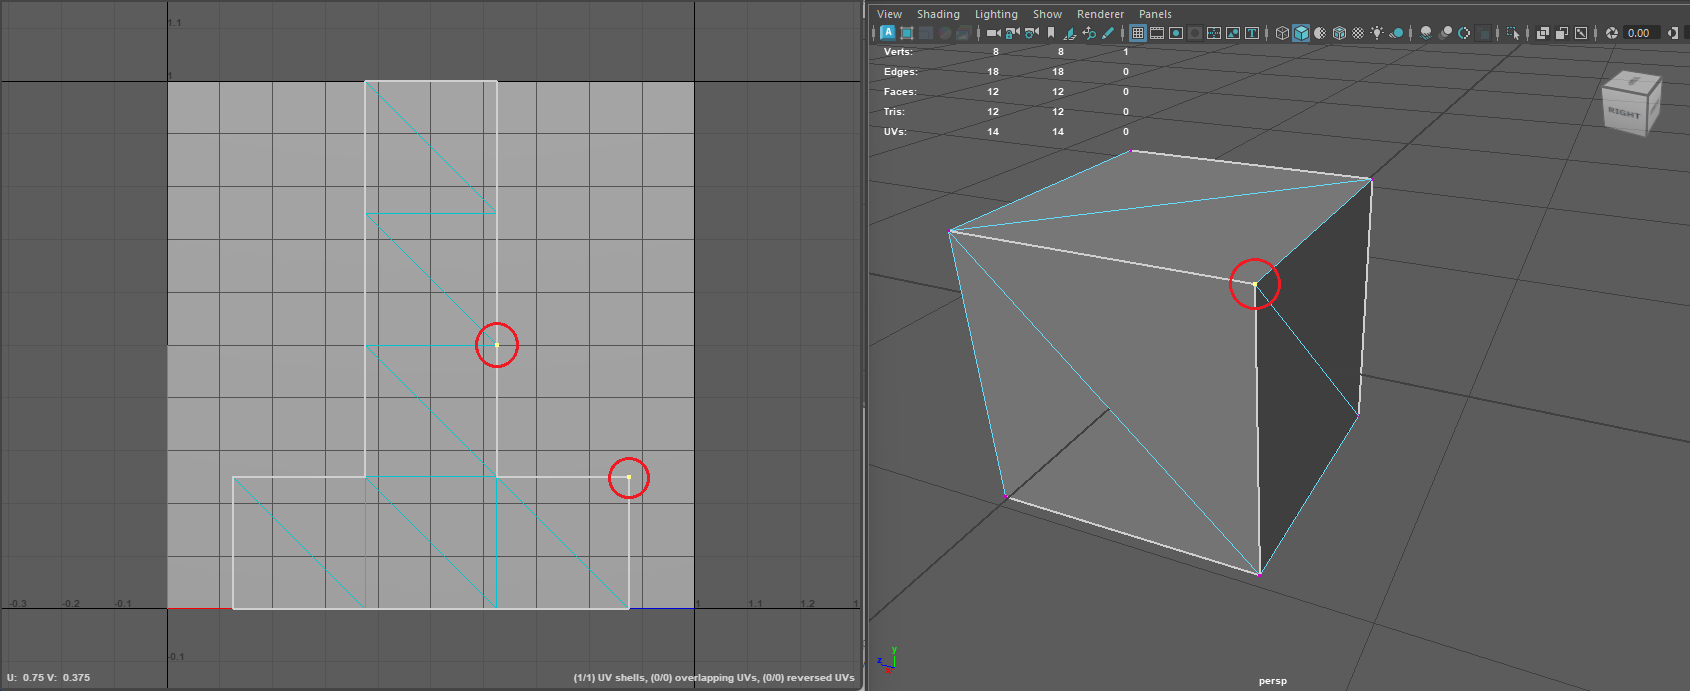
To the best of my knowledge, this is because UV data is technically stored per face-vertex, meaning that a single vertex may have multiple pairs associated with it based on how many polygon faces that vertex is a member of. In the context of material expressions, what I think happens is that any mathematical operation you perform on UV data in the vertex shader is actually applied to each face-vertex UV, but once primitive assembly happens, each triangle will reference the UV data specific to its face-vertex. Finally, when those triangles are rasterized, the per-pixel UV data is actually interpolated from the three vertices that make up each triangle.
This leads us to the explanation of what data is actually flowing out from the TexCoord output pin:
For each pixel covered by a triangle on the surface of an object, the TexCoord node outputs two floating point values (u, v) representing the 2d coordinates for that pixel, which are computed by interpolating between the UV coordinates of each of the three vertices of that triangle.
For more info about how UV data is stored on the mesh, see:
Visualizing UV Coordinate Data
UV coordinate data can be visualized using the UV coordinate coloring scheme:

This coloring scheme basically reframes each coordinate (u, v), as a pair of colors (red, green). The image above is extra special because if you imagine it as perfectly filing up the U1V1 space, the color of each pixel in the image perfectly corresponds to that pixel’s location in U1V1 space. So for example, the pixel in the bottom righthand corner is red because (u=1.0, v=0.0) produces a color of (red=1.0, green=0.0), or pure red. The pixel in the upper righthand corner is yellow because (u=1.0, v=1.0) produces a color of (red=1.0, green=1.0), or pure yellow.

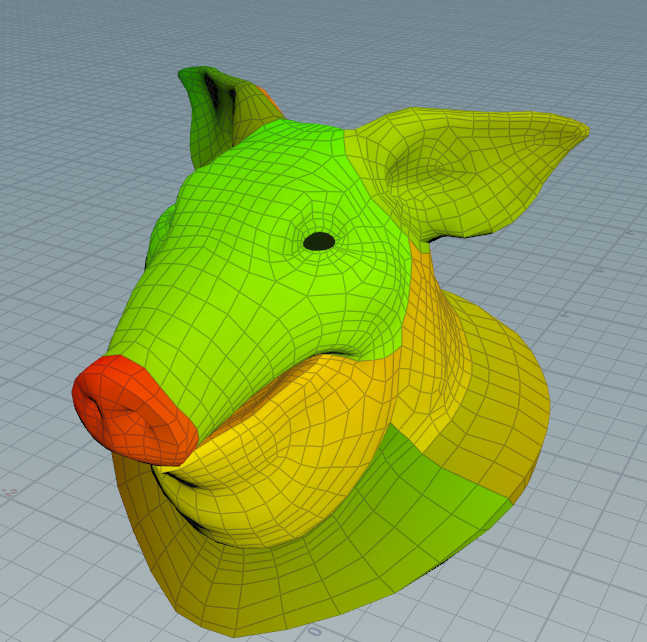
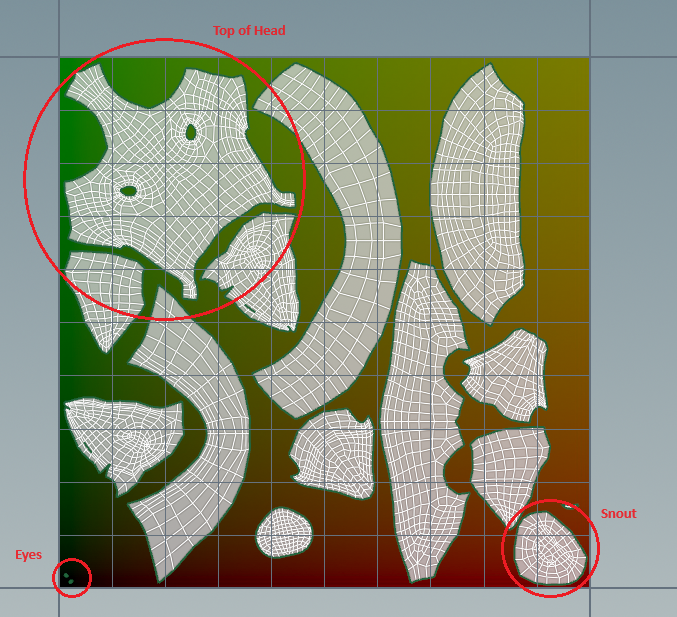
On actual geometric data, this can help you visualize what part of the texture each area of the 3d object is mapped to. For example, take a look at the 3d object below. Without even looking at the UV map, you can tell that the top of the head must be in the upper lefthand corner of the UV space, the snout must be in the lower right, and the eyes must be in the lower left.
Note that the uv color visualization can change depending on how your textures are stored in memory by your graphics API.
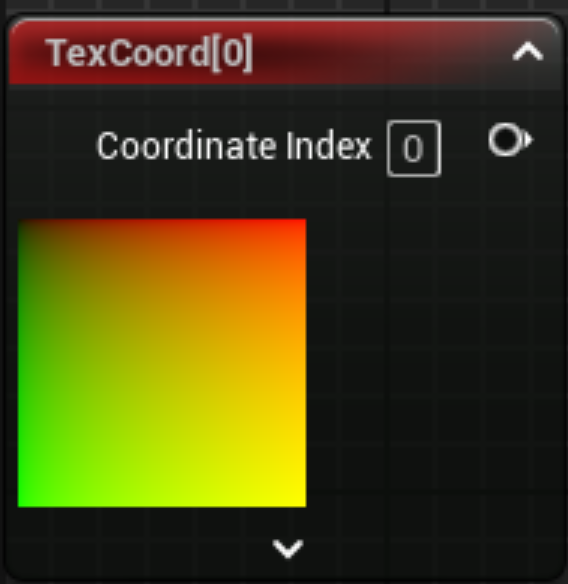
- In OpenGL, textures are stored bottom up- i.e. the bottom left corner is 0,0.
- In DirectX, textures are stored top down- i.e. the top left corner is 0,0.
Unreal uses DirectX, so you will see rotated uv colors in the TexCoord node:
More info on openGL vs DirectX texture coordinates:
Math Operations On UV Coordinate Data
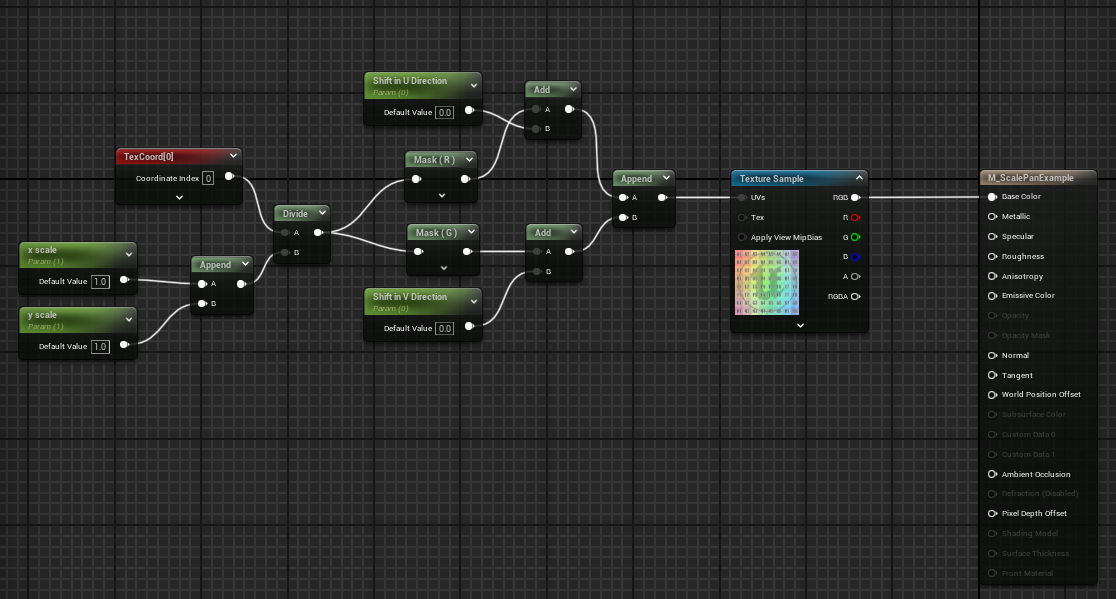
When writing shaders (HLSL or material graphs), you can perform math operations on the uv data. For example, if I were to add 0.5 to the red channel of the uv coordinates, that would be equivalent to physically dragging all the UVs for that object in the u direction by 0.5. This leads to all kinds of interesting techniques for scaling and shifting textures applied to objects.


Flowmaps
A flowmap is a special texture where each pixel contains a value that can be used to transform some existing uv data. The standard flowmap transformations match the standard OpenGL UV color scheme.
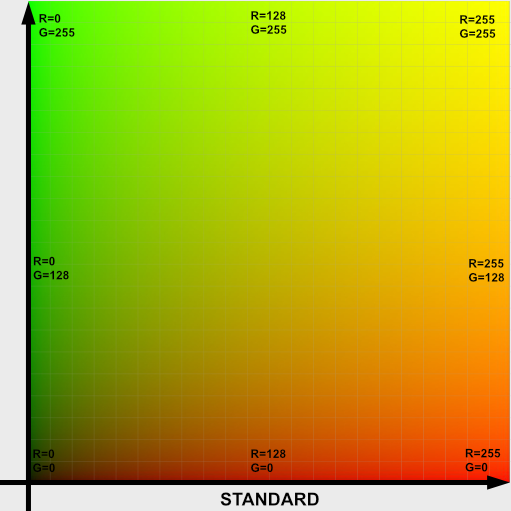
Note that the image above is not the flowmap itself, but is a representation of what direction a pixel in the flowmap will cause uv data to shift by. Let’s say you wanted all UVs in the upper right quadrant of the UV coordinate space to shift vertically. In that case, the resulting flowmap would look like:

Also note that engines that use DirectX (like Unreal Engine), will have the y axis flipped.

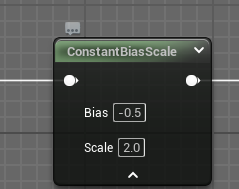
By default, if you use a flowmap to transform UVs, you can only go in two directions because the color values range from 0 to 1.0 (0 to 255 in color space). However, if you perform a bias transformation of 2(V - .5), you are altering the range to be from -1.0 to 1.0. This effectively shifts the axis to the center. i.e. if the input color is pure green (0, 1.0), the shifted value will be [2(0-.5), 2(1.0 - .5)] or (-1, 1). When you add the shifted value to your existing UV coordinates, it will scroll the UVs towards the bottom left.

In the unreal material graph, this bias transformation can be performed with the ConstantBiasScale node:
Flowmap Example: River Generator
Flowmaps don’t have to just be sourced from a texture. A common technique for storing flowmap data is to imbed it directly into the vertex colors of the mesh you want to use it on. This is precisely the approach I used in my Houdini river generator. Below, I describe the general strategy for the tool.
First, the generator takes in an unreal landscape spline as input.
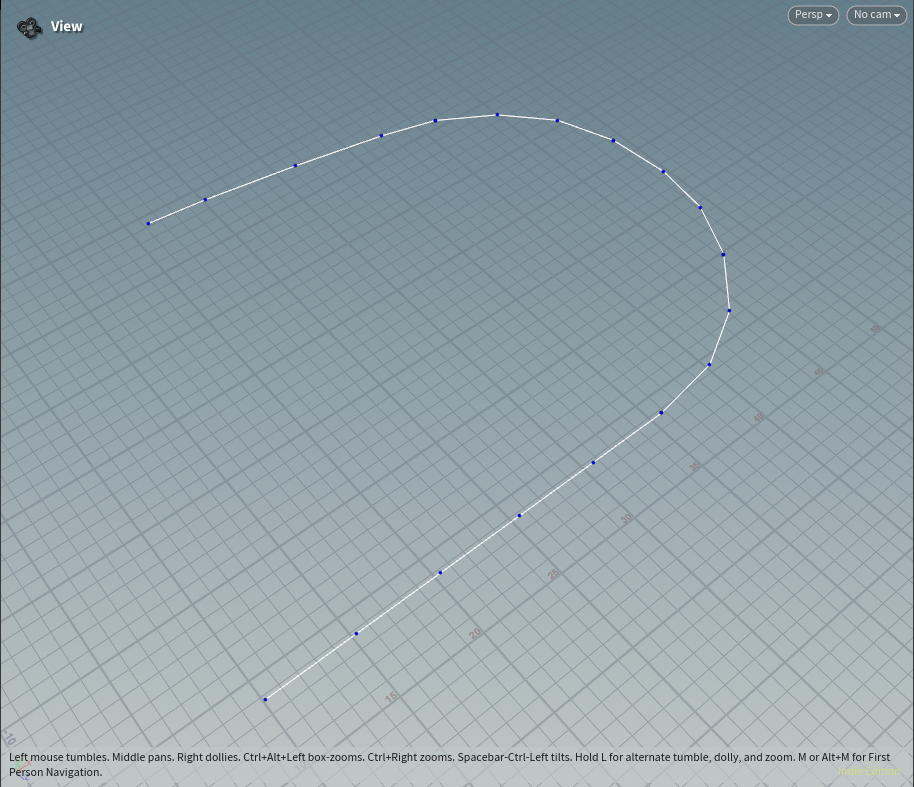
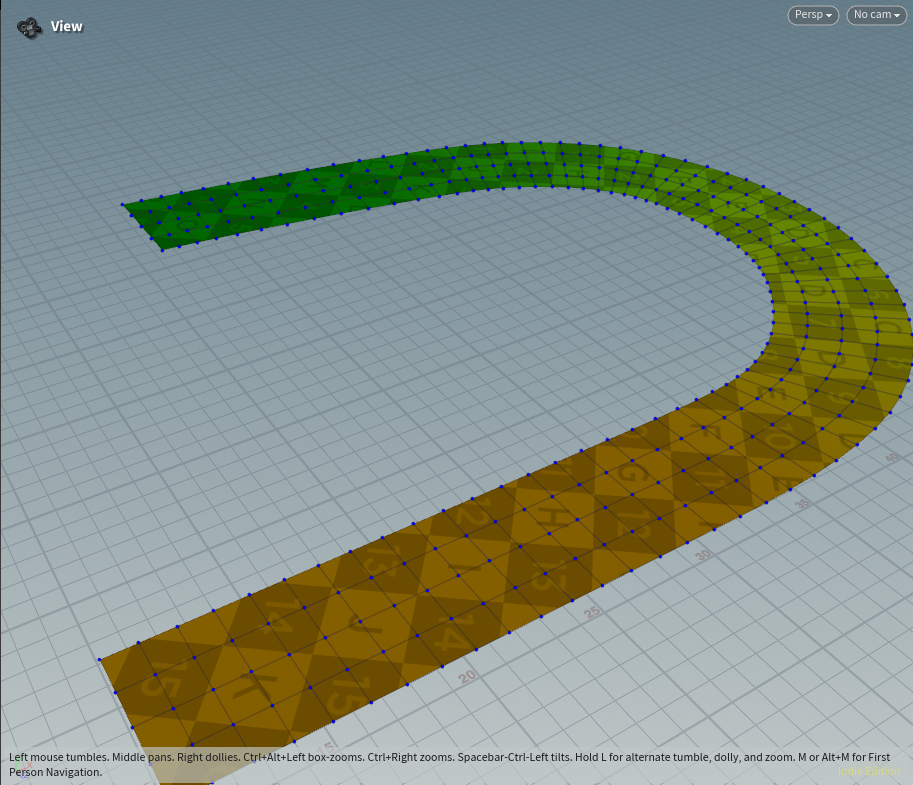
Width values attached to each vertex in the landscape spline are used to build out the river mesh.

The tangent vectors of each point describe the flow of the river.

These points are transposed from the input spline onto the output mesh.

Finally, the vectors are converted into vertex colors so that they can be imbedded directly onto the mesh.
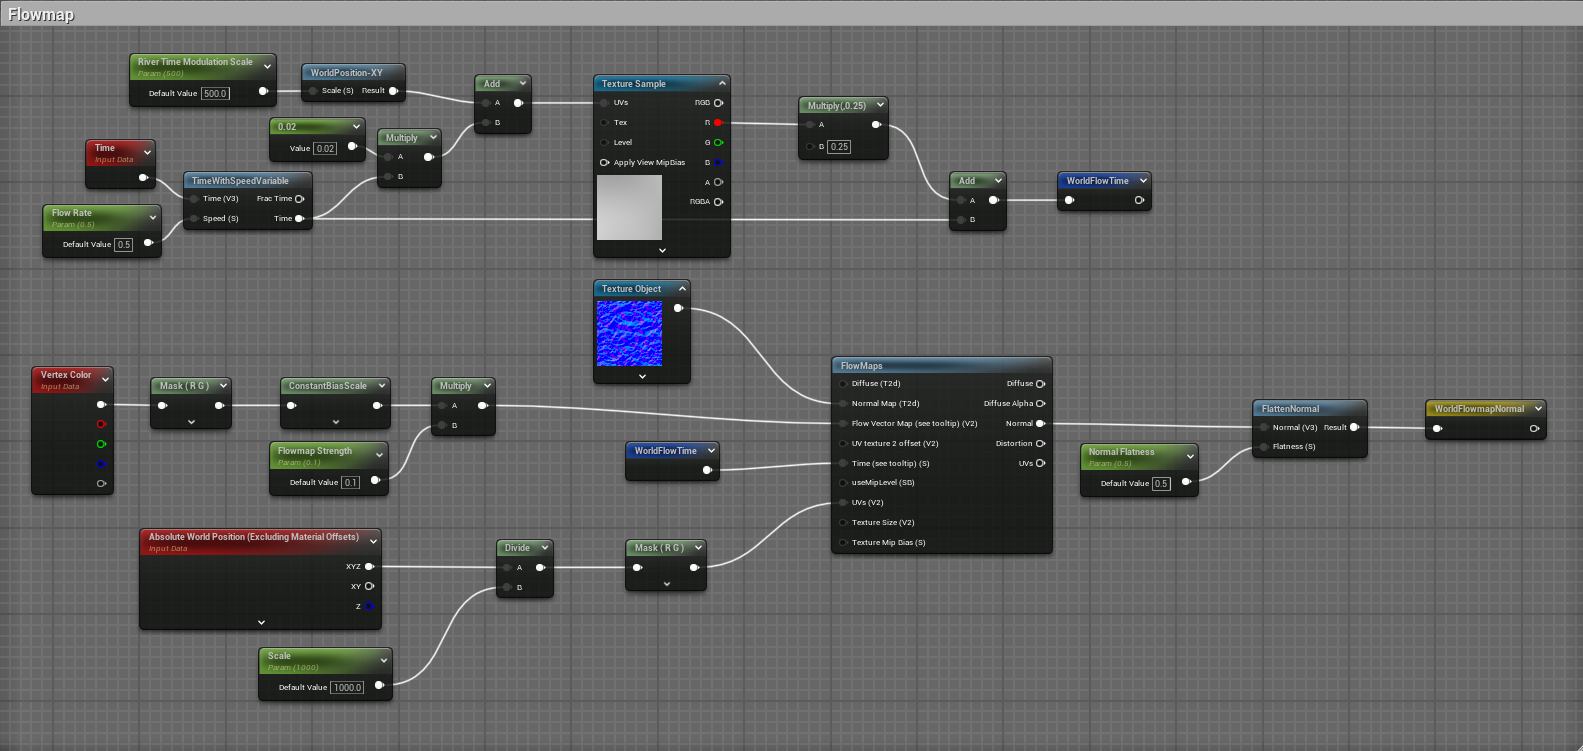
In Unreal, the vertex colors can be used by a material to pan the water texture along the path of the flowmap. Note that in the graph below I’m actually using the world position node in place of the TexCoord node. I found that using world position helped reduce visual artifacts when panning the texture. To support this change, I modified my Houdini asset so that I could output the vertex colors in UV space or in worldspace.
Here is the final result: a river mesh with a water texture that pans along the path of the mesh. The green lines are from the landscape spline that was used as input for this tool.
