Blending Landscape Materials in Unreal Engine
A common workflow when creating terrain in Unreal Engine is to create a complex master material that allows you to combine the various elements of your landscape (dirt, grass, rock, snow, etc) together. Understanding all your options when creating such a material can be a bit daunting, since in classic UE fashion there are multiple features with similar names that do completely different things. This document aims to give you a concise overview of the different ways you can blend your landscape materials together.
Automaterials
One of the best ways to jumpstart your landscape material is to create an Automaterial. The first thing to note is that an automaterial is not really an official “type” of material, but is more a technique that can be applied when creating your material. There are different strategies for creating these, but the basic idea is create a material that uses geometric data like the slope of your landscape to determine which textures to blend in.
For example, the UE PCGElectricDreams sample project uses an automaterial for its landscape that blends between grass, mulch, rocky dirt, and cliffs based on the slope of the landscape. In the video below, you can see that when the landscape is flat, the material applies a grass texture and a mulch texture, blended together using a noise mask for some random breakup. As the landscape gains a slight slope, the rocky dirt texture is blended in. Finally, as the slope becomes more severe, it switches to the cliff texture. If you want the technical details of exactly how this material was constructed, I highly recommend downloading PCGElectricDreams and digging through the M_BGLandscape_Auto material graph.
Automaterials are a great starting point for your landscape, but they won’t necessarily get you all the way towards a great looking final product. To get the rest of the way, you are typically going to want to use Unreal’s Landscape Layer system, combined with either manual layer painting or layer masking.
Landscape Layers
Landscape Layers: Overview
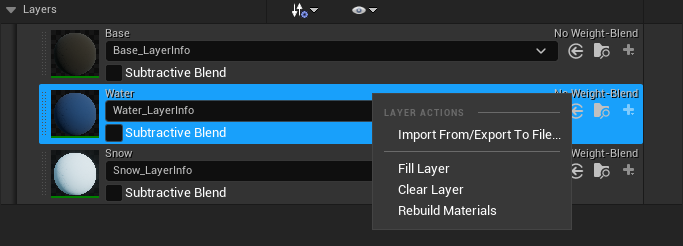
Unreal provides a special system for painting weightmaps (masks) for your landscape. In the editor, these weightmaps are represented as paint layers.
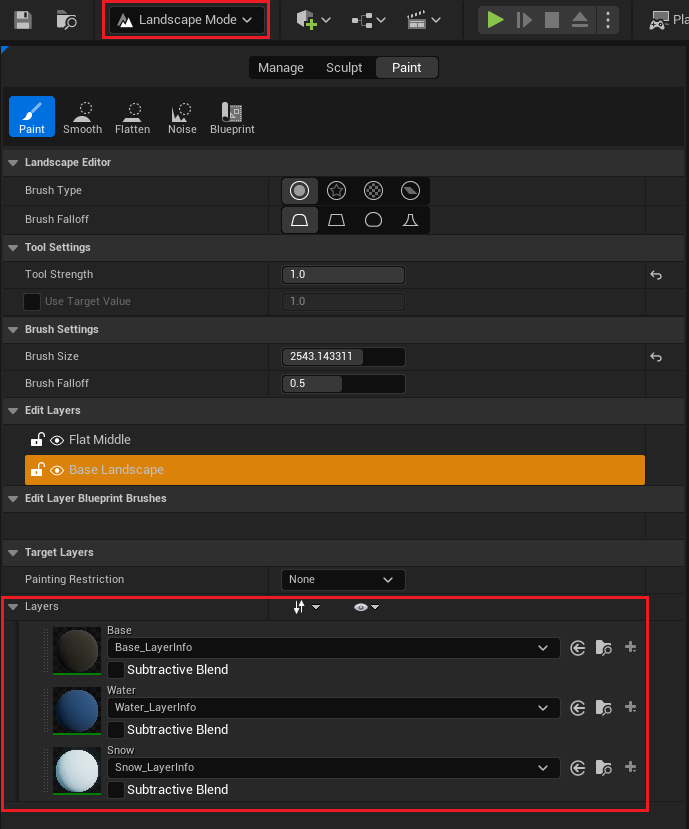
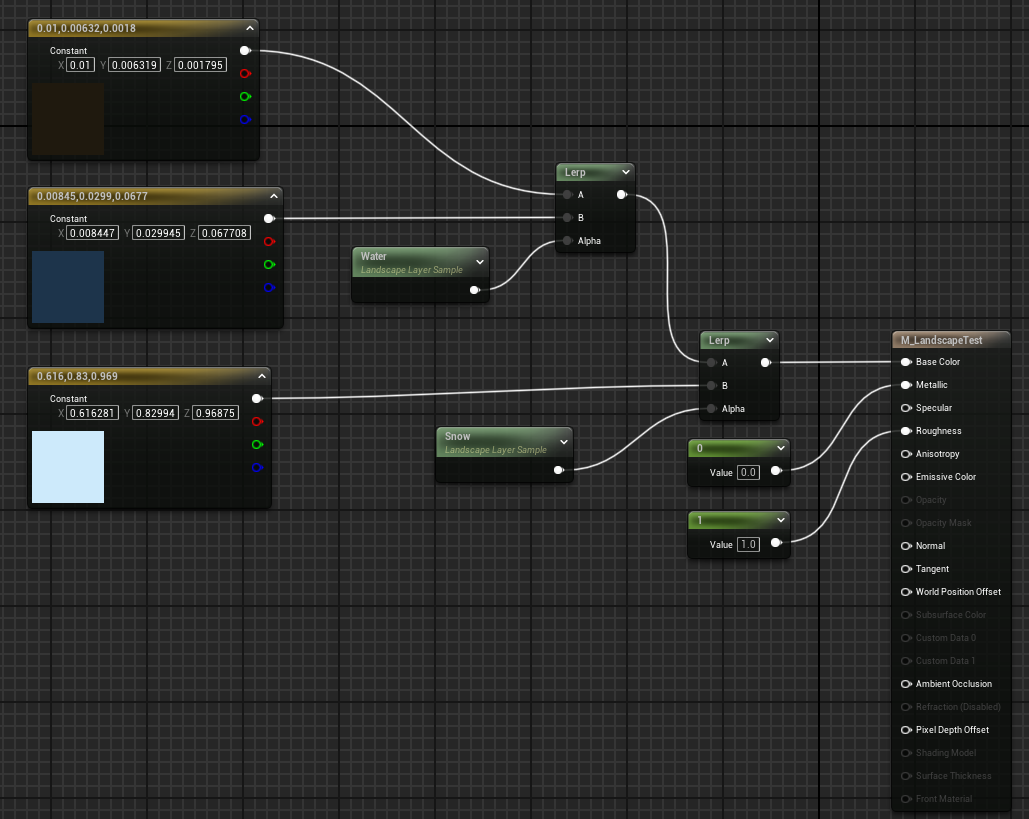
In order to get these layers to actually show up as options for your landscape, you must create a material for your landscape that uses either the Landscape Layer Sample node:
or the LandscapeLayerBlend node:
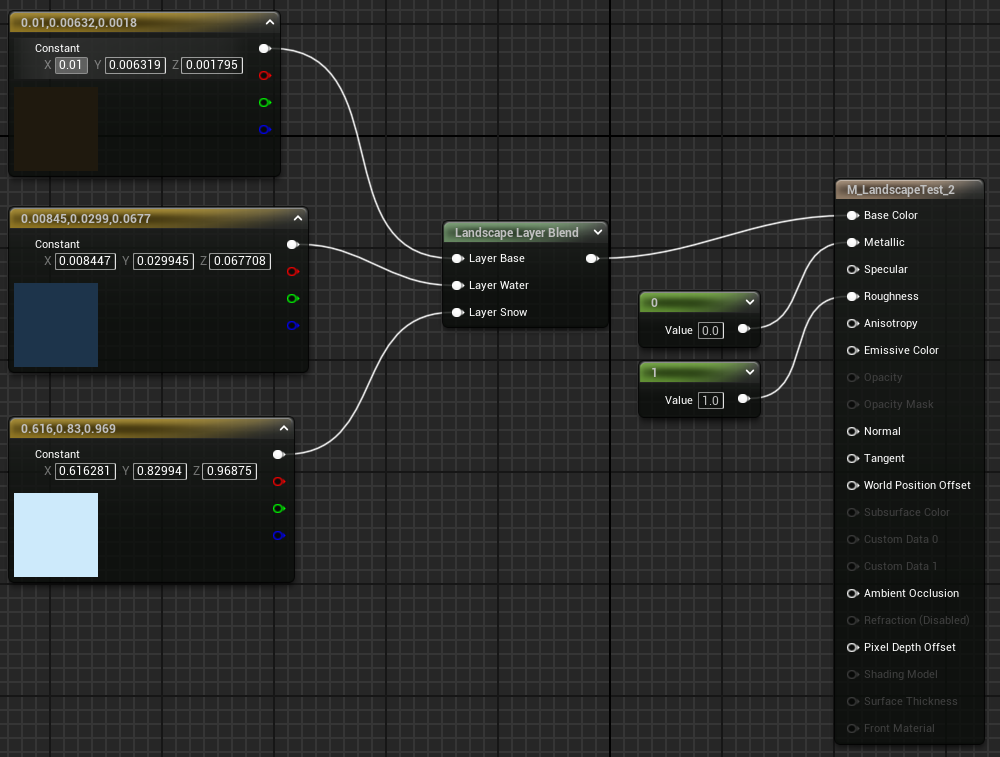
Whatever layer names you type into the details panels for either of these nodes will be the same names you see for the paint layers in the landscape editor. For more information about these nodes, see the Landscape Layer Blending section below. Also, you may notice that when you try to use your paint layers in the landscape editor, it wants you to create a “LayerInfo” object. For more information about that, see the Landscape Layer Editor Blend Type section below.
Landscape Layers: Technical Info
Under the hood, each paint layer is represented as a weightmap which is just a greyscale image where each pixel is an 8-bit value ranging from 0 (pure black) to 255 (pure white). So for example, I have a simple landscape here where I have manually painted some weights into the water layer:
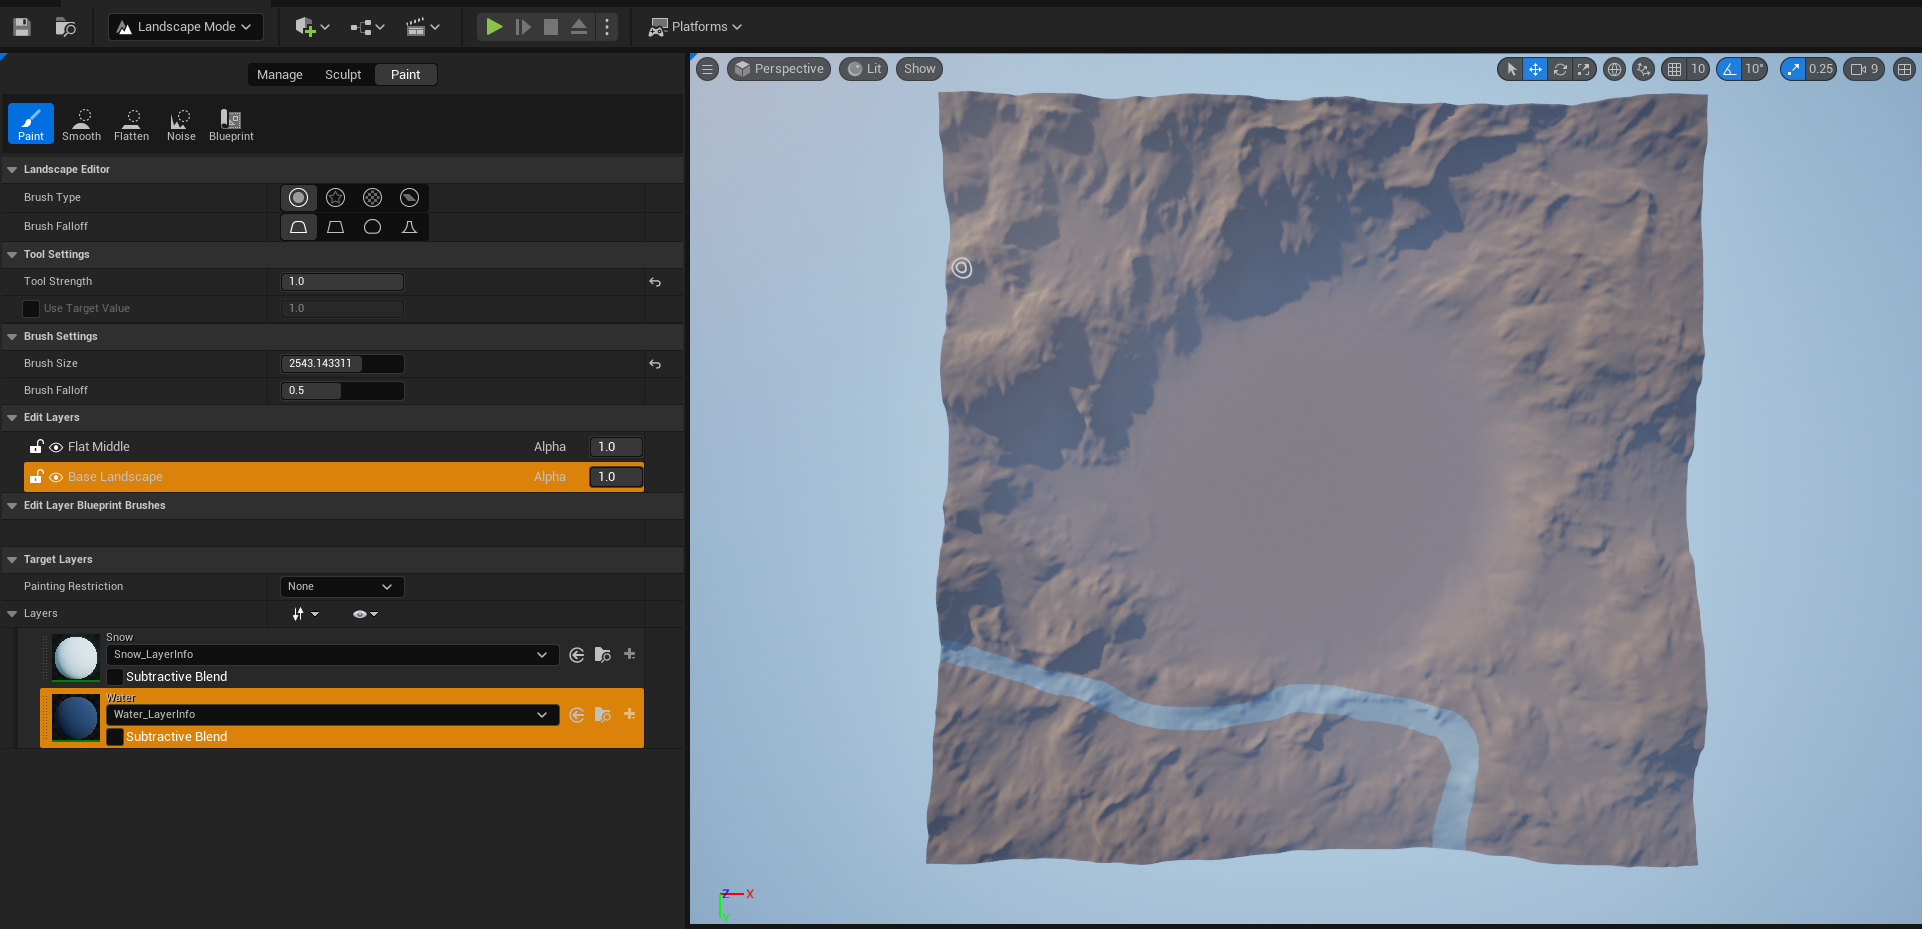
If I export this layer out to a file (right click the layer, select “Import From/Export To File…”), I get the image representation of my weightmap:
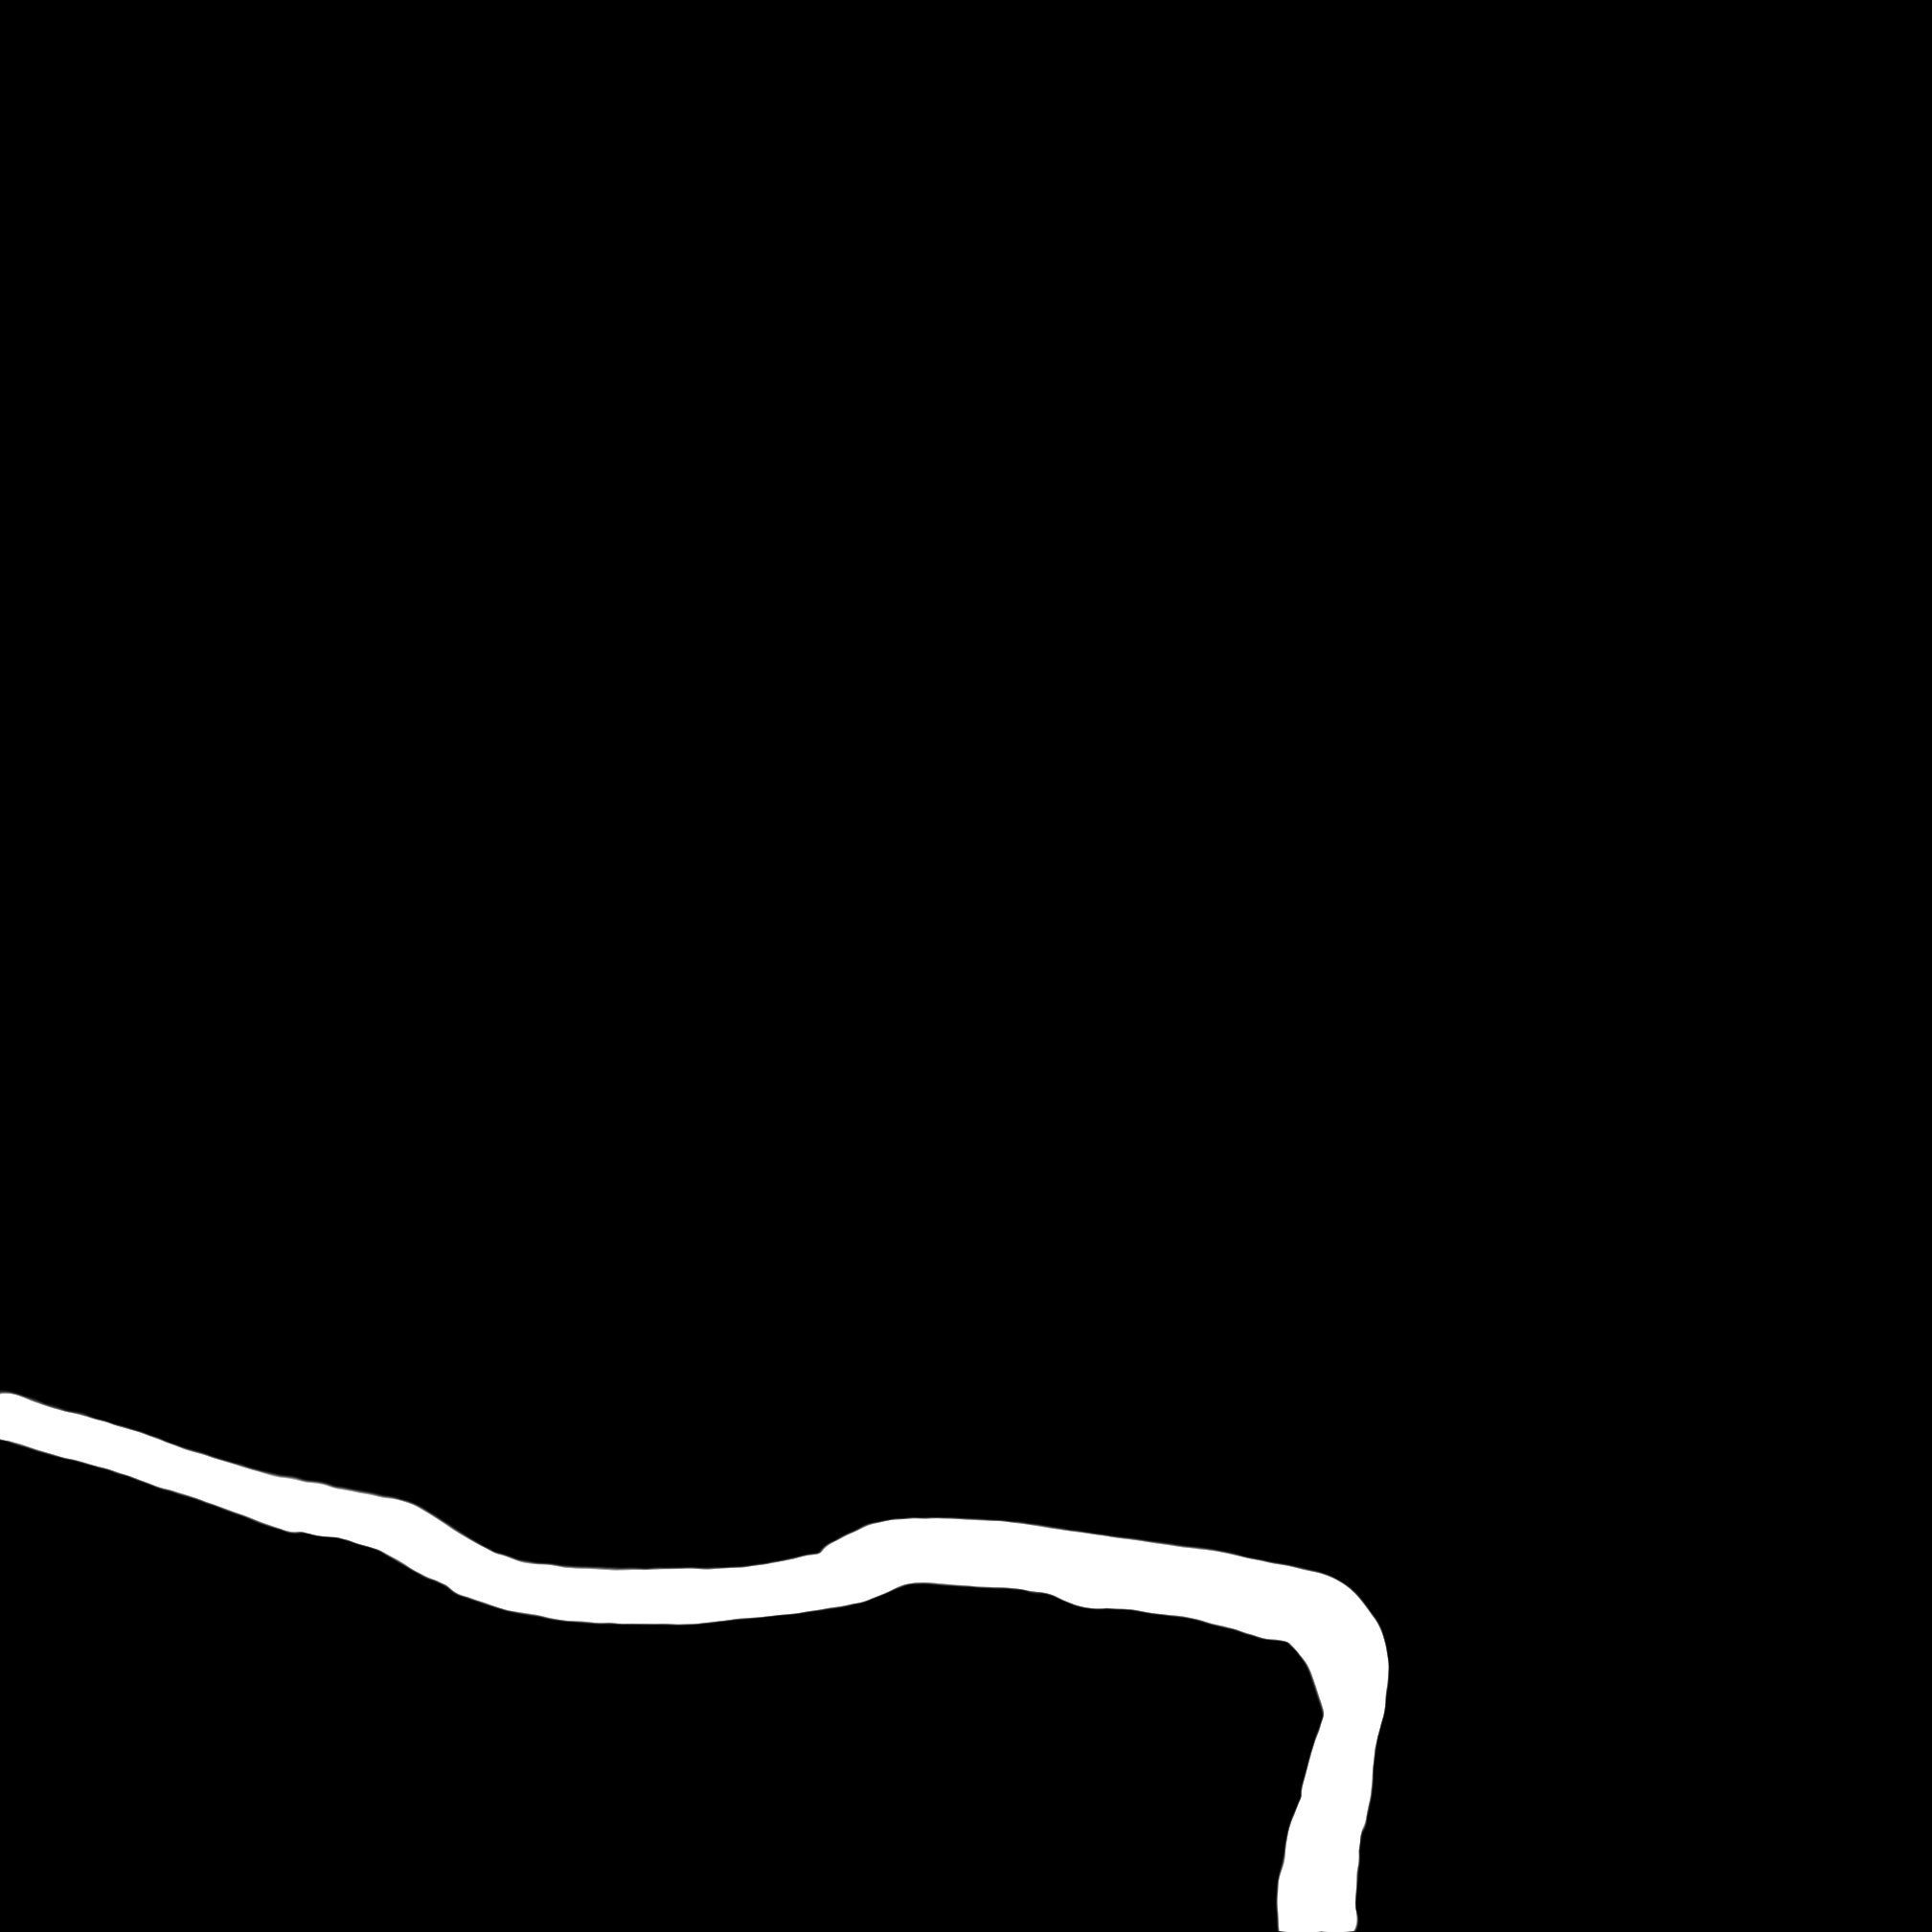
Note that when you sample the weightmap in the material graph, unreal converts this 8bit 0-255 value to a float representation ranging from 0.0 to 1.0. You can test this yourself by:
1) Exporting a fully painted paint layer from unreal, which results in a pure-white mask image. 2) Reimporting this weightmap image and setting texture compression settings to Masks (no sRGB). 3) Sampling the texture in your material graph and hooking up the results to a debug node.
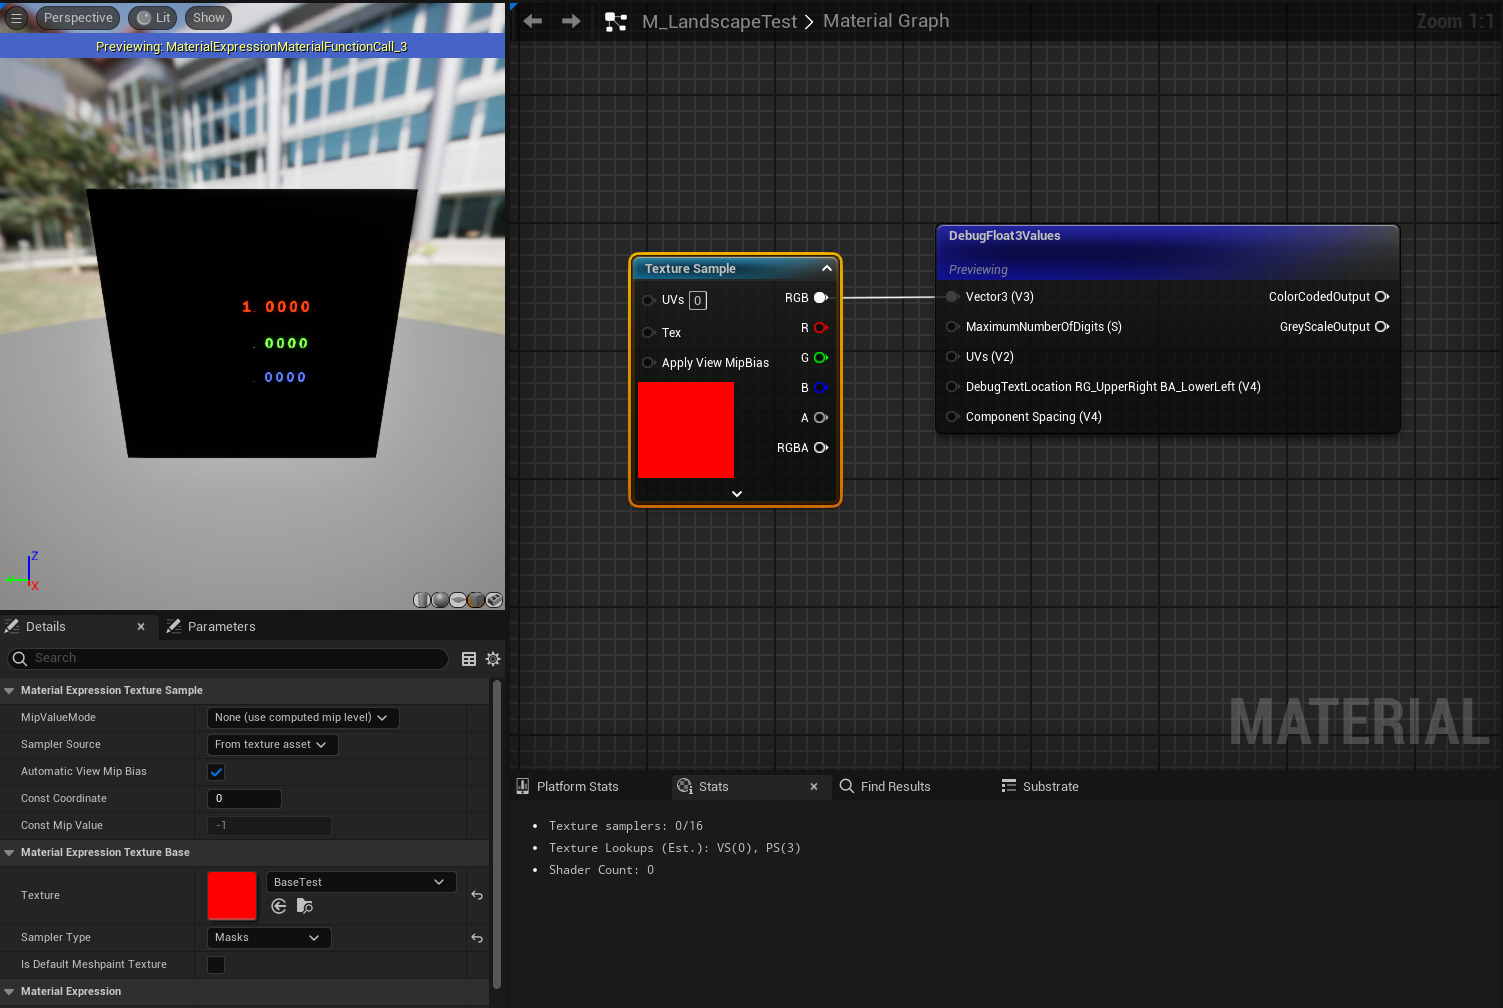
Note that the texture appears red since with the Masks texture compression mode Unreal is throwing away the green and blue channel data as it is redundant.
This texture sample node is basically doing the same thing that the Landscape Layer Sample node is doing. You can see this by going to FHLSLMaterialTranslator::StaticTerrainLayerWeight() inside HLSLMaterialTranslator.cpp:
// This fn is called by UMaterialExpressionLandscapeLayerSample::Compile(), which is the code
// responsible for the LandscapeLayerSample node.
int32 FHLSLMaterialTranslator::StaticTerrainLayerWeight(FName LayerName,int32 Default)
{
    // ...

    constexpr EMaterialSamplerType SamplerType = SAMPLERTYPE_Masks;

    // ...

    int32 TextureCodeIndex = TextureParameter(
        FName(*WeightmapName), GEngine->WeightMapPlaceholderTexture, TextureReferenceIndex, SamplerType);
    	int32 SampleCodeIndex = TextureSample(
            TextureCodeIndex,
            TextureCoordinate(3, false, false),
            SamplerType,
            /*MipValue0Index = */INDEX_NONE,
            /*MipValue1Index = */INDEX_NONE,
            /*MipValueMode = */TMVM_None,
            /*SamplerSource = */SSM_TerrainWeightmapGroupSettings
        );

    // ...
}
Also side note, I’m pretty sure that the int32 returned by this fn isn’t really an int32, but rather is using some type of bit packing to store the floating point RGBA texture data. However, I’m not sure exactly how this data is arranged.
Landscape Layers: Importing From A File
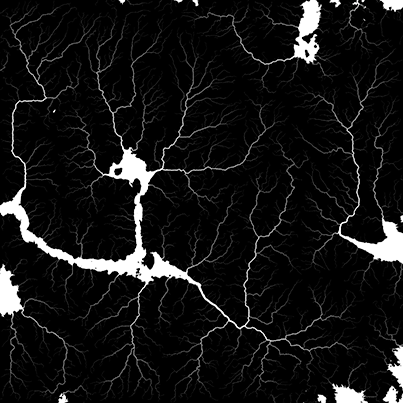
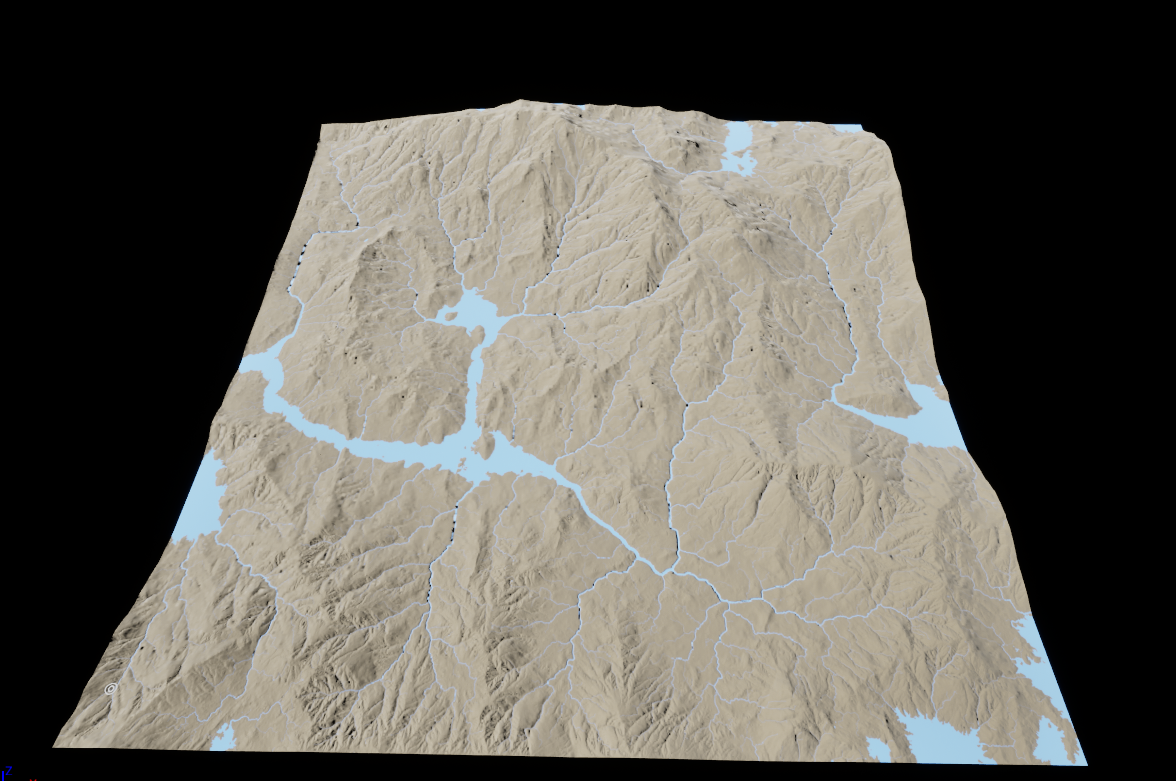
In addition to manually painting in layers, you can also import them from a file. For example, the greyscale image below is a mask that was created in Gaea and then imported into Unreal Engine. These mask files can be imported when you create your landscape, or after landscape creation- by right clicking on a layer and selecting “Import From/Export To File…”.
Landscape Layer Blending
Once you have your layers painted, you probably want to blend them together in some way inside your landscape material. The two main ways of doing this are to either use the Landscape Layer Sample node or the Landscape Layer Blend Node.
Blending Using Landscape Layer Sample Node
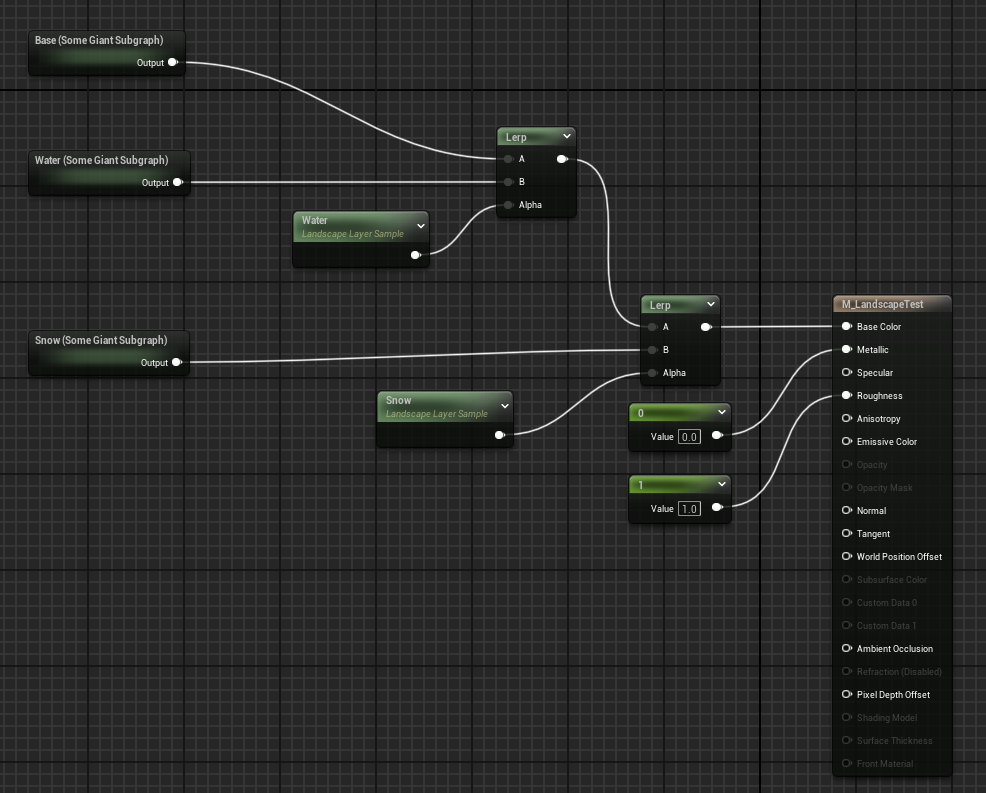
The Landscape Layer Sample node will output a sampled weight value from 0.0 to 1.0 for each pixel in the corresponding paint layer’s weightmap. You can use this as the alpha for a lerp to blend two textures together:

Each lerp effectively blends the current layer on top of the previous layer. Note that with this approach, you don’t actually need to paint in the base layer at all. You can just assume it by default.
Also note that you don’t have to do something as simple as blending in a flat color or a single texture sample. You could have an entire automaterial setup as your Base layer and then blend in some equally complex material subgraphs for your water, snow, etc.
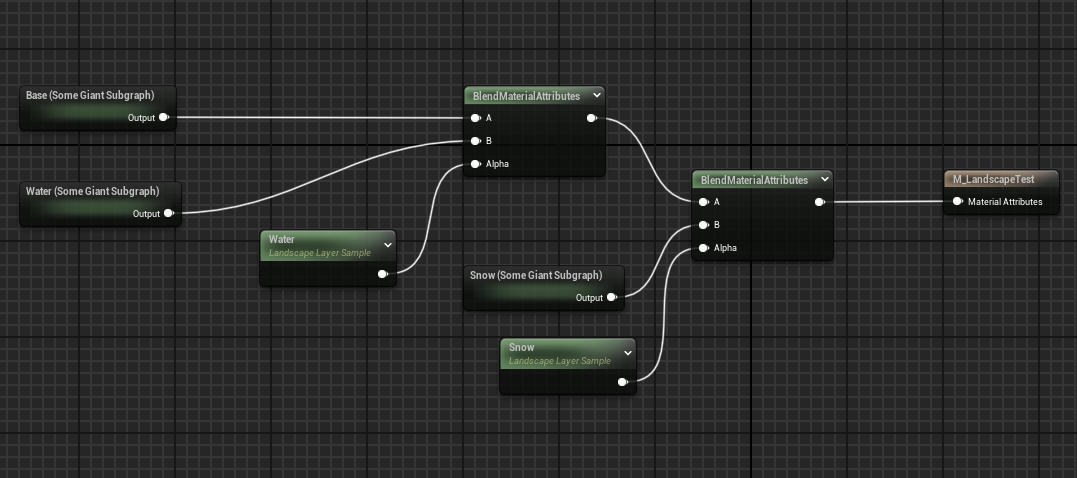
Another thing you can do is output entire sets of material attributes and then blend them together using the BlendMaterialAttributes node.
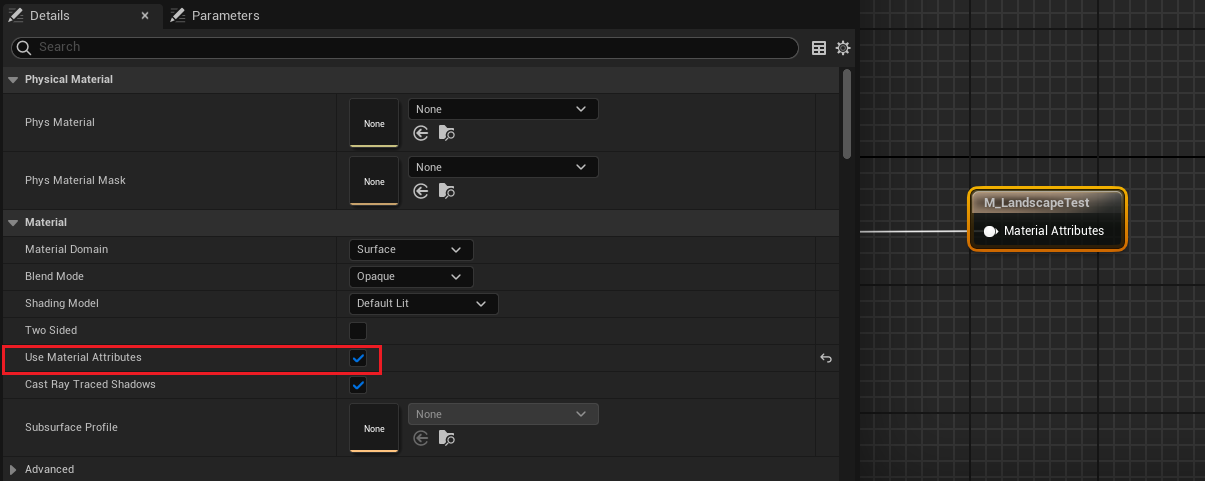
If you go for this approach, you need to collapse your result node receive just a MaterialAttributes object by checking the “Use Material Attributes” option in the details panel for that node. This simply groups all those options you saw before into a single pin.
Blending Using Landscape Layer Blend Node
Instead of manually blending each layer yourself, you can alternatively use the Landscape Layer Blend node. This node comes with three different blend settings:
- Alpha Blend
- Weight Blend
- Height Blend
Note: If you want to see the code where these blend operations actually happen, check out MaterialExpressionLandscapeLayerBlend.cpp.
Alpha Blend
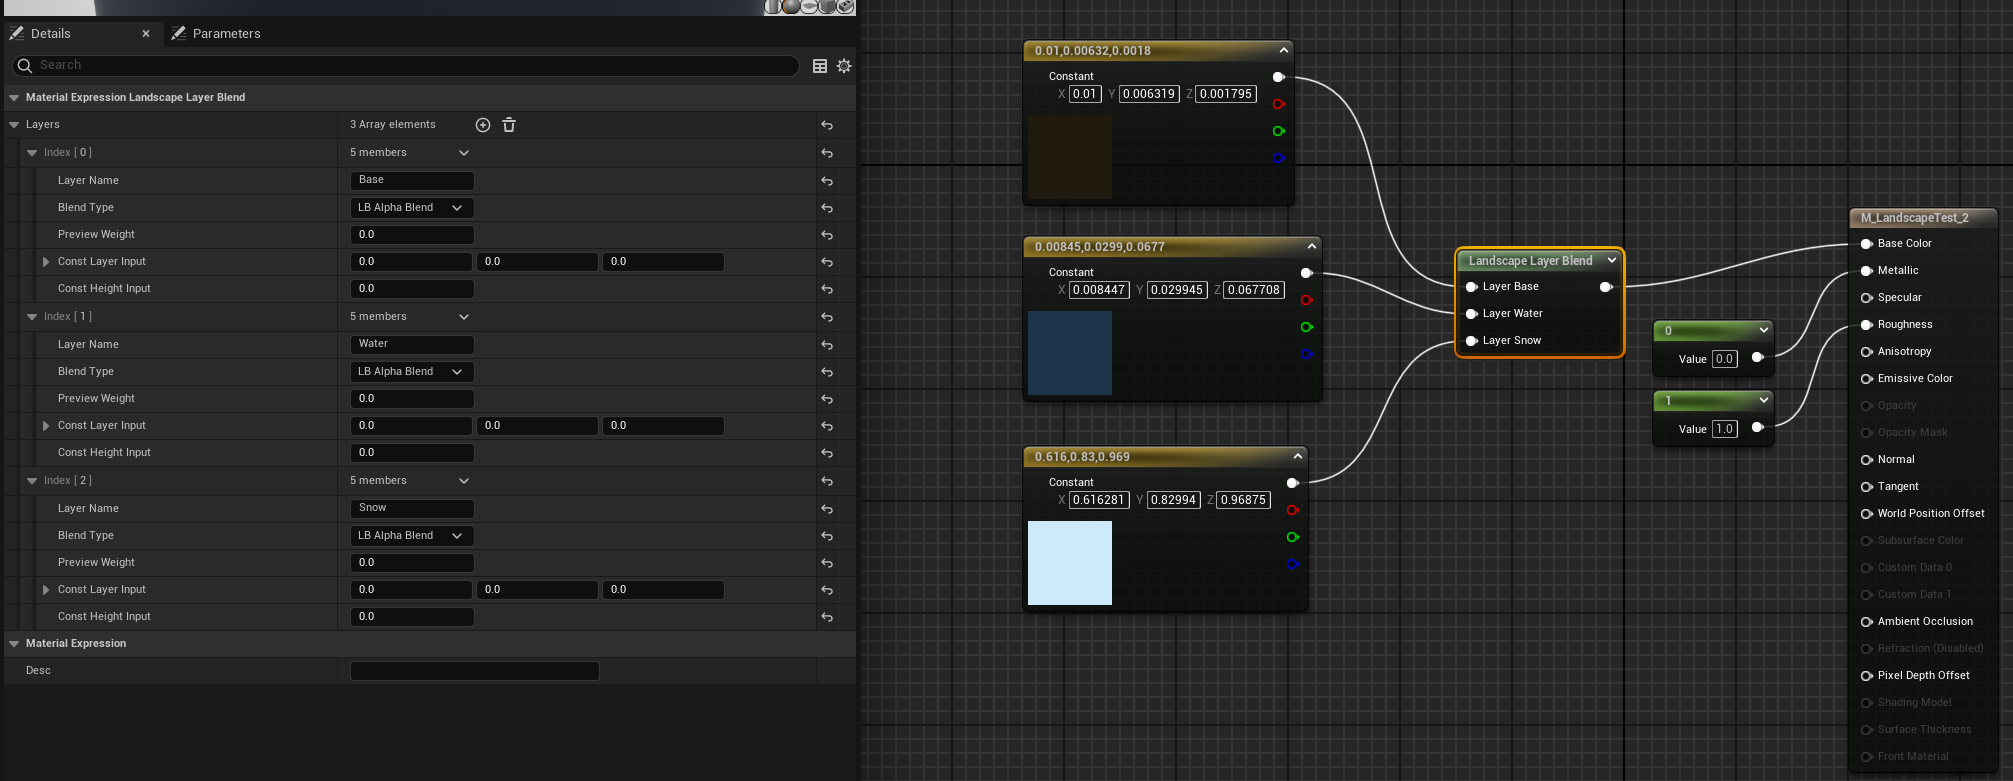
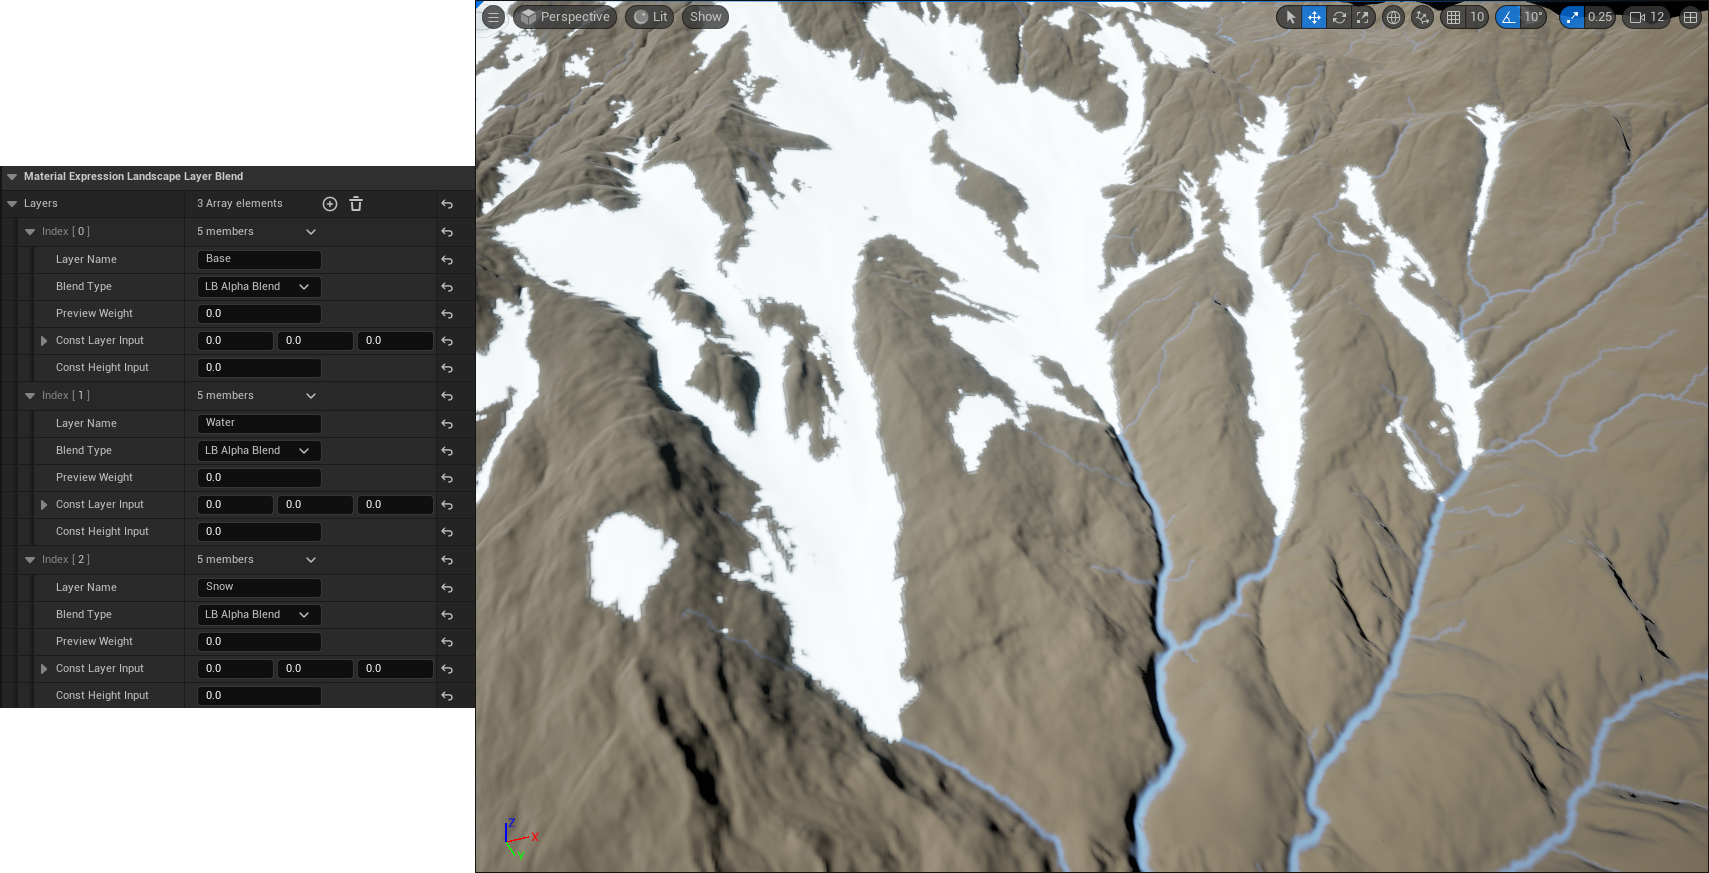
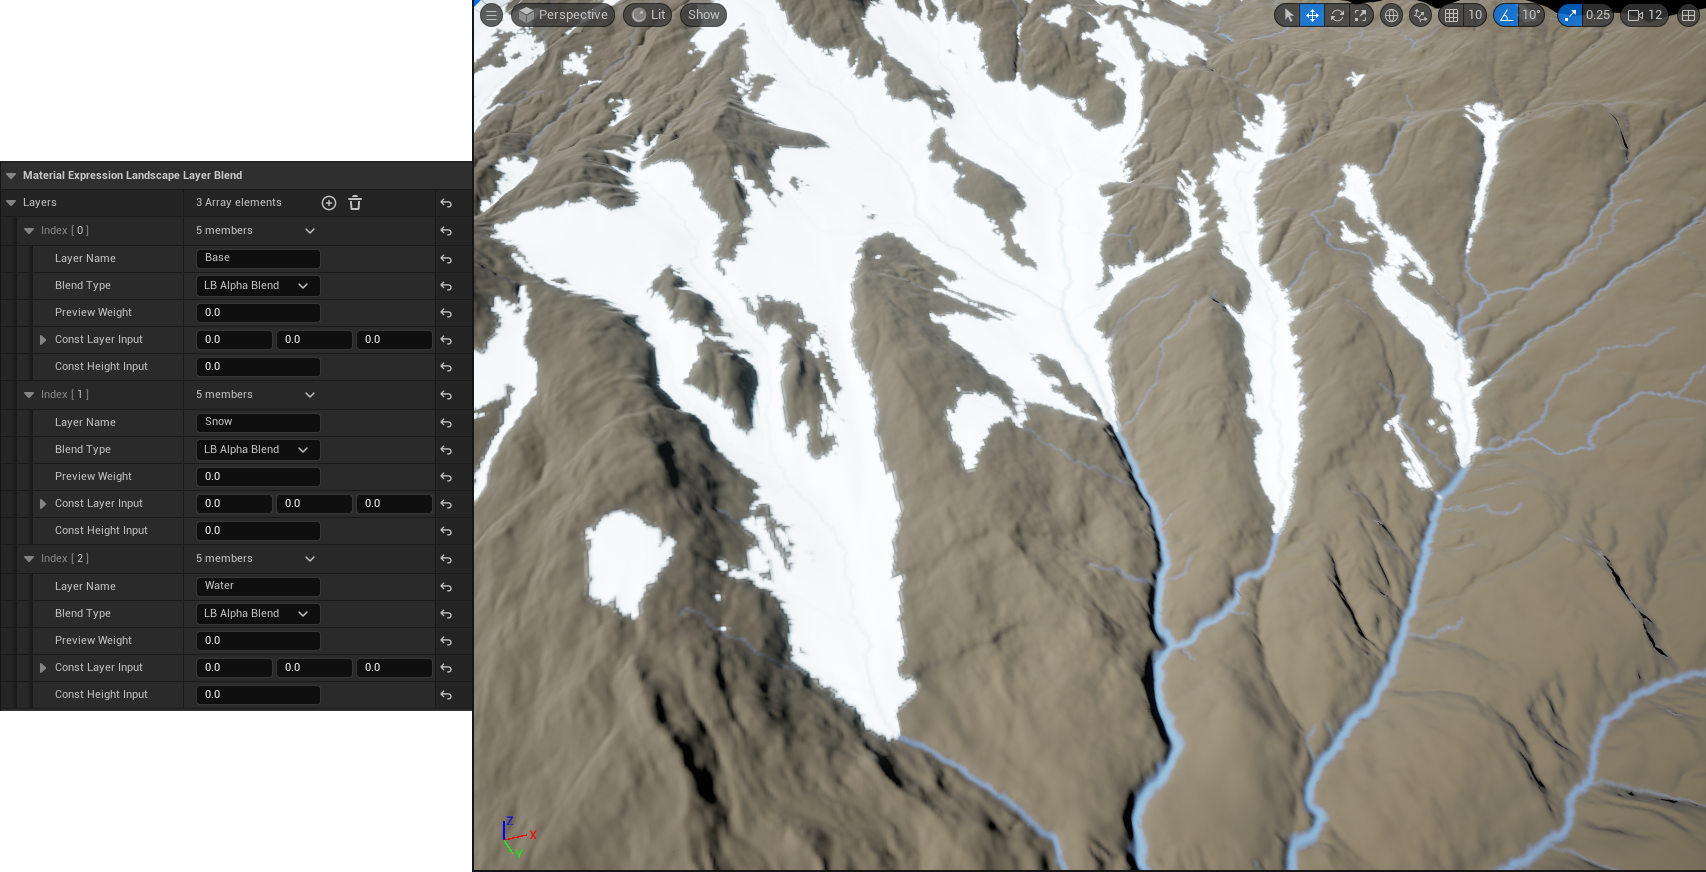
This blend type works the same way as if you were to manually lerp each layer with the previous layer using the current layer’s sampled weight map as the alpha. It results in layer stack where each layer is blended on top of the next one, so in this case order matters.
Weight Blend
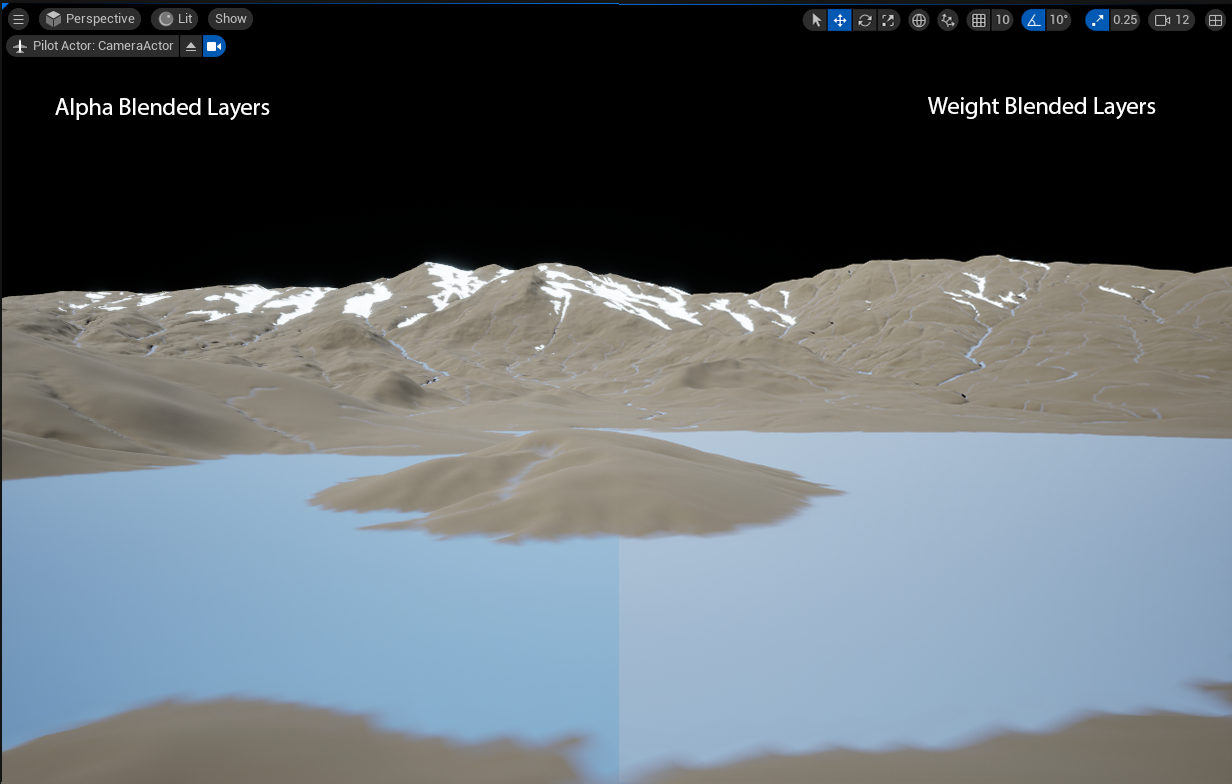
Weight Blend works by multiplying each color by the associated layer weight, and then adding all those weighted colors together. This add operation works like a Linear Dodge where the combined color ends up being brighter than the two input colors. Because everything is added together, layer order does not matter.
Height Blend
Height blend works like weight blend but allows you to input an additional heightmap texture, which can be used to paint the one layer into the crevices of another layer. I have not played around with this too much yet, but you can find many examples of this being used on YouTube.
Landscape Layer Editor Blend Type
Okay, ready for the confusing part? When you setup your landscape layers while in Landscape Mode in the editor, you will be prompted to create a “LayerInfo” object for each layer. Furthermore, when you create this object, you will be asked if you want the corresponding layer to be a weight blended layer or a non-weight blended layer. This distinction (which doesn’t really have an official name- so I will call it the editor blend type) has nothing to do with the blend types available in the Landscape Layer Blend node in the material graph. The important difference is that the material graph blend type influences how the various layers/weights that have already been painted are finally combined together whereas the editor blend type influences what happens to the various layers/weights in your landscape as you are painting them.
More specifically, if you create a layer with a weight blended layer editor blend type, whenever you increase the weights in a layer- i.e. paint in that layer, manually or otherwise- the unreal editor will uniformly decrease the values of the weights of all other weight blended layers currently associated with your landscape material. You can see this in action in the example video below- in the spot where I paint in snow, the base layer and water layer weights are actually erased.
This works in the opposite direction as well. If you start erasing a weight blended layer, all the other layers will have their weights uniformly increased.
Resources
- PCGElectricDreams
- Good example of a basic auto material
- Inside Unreal - Tech Art with Chris Murphy
- A little old now, but a great resource for advanced blending techniques.
- UE Docs- Landscape Paint Mode
- Explains Layer Info Objects and Editor Blend Types