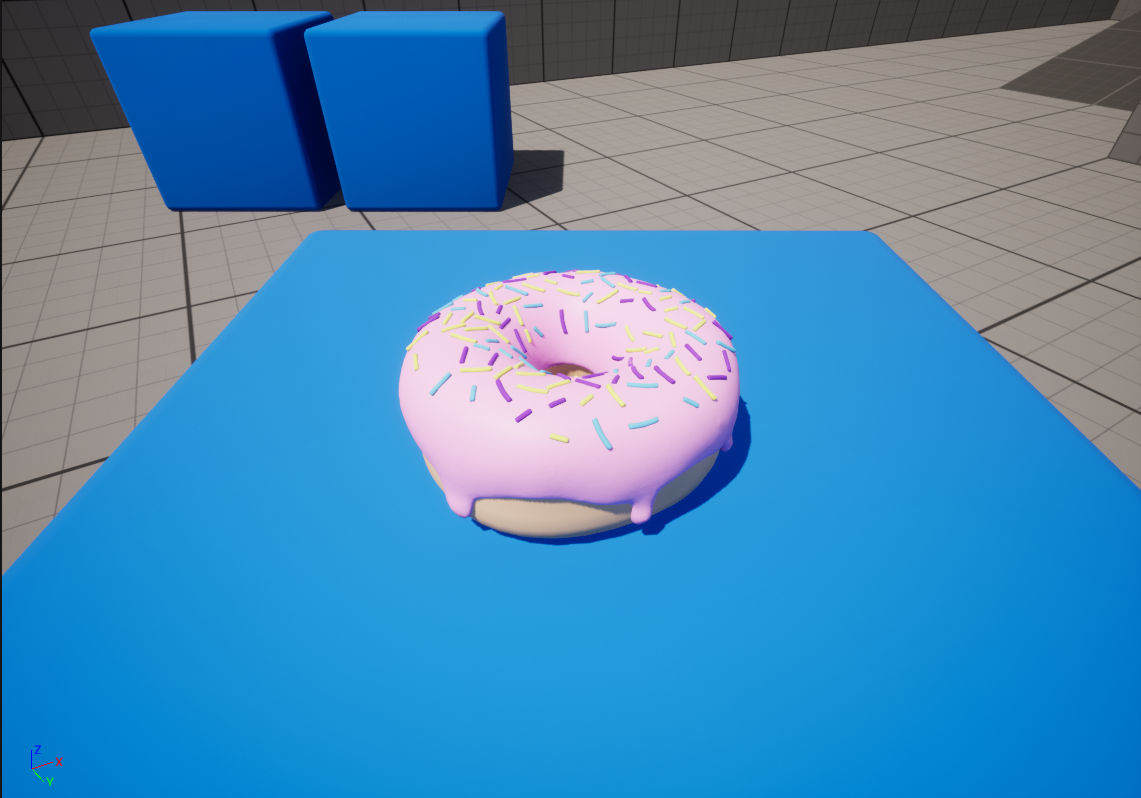
Project Diary: Creating a Donut with Procedural Sprinkles
In this project diary, I am going to be exploring a 3d workflow for game development. My goal here was to explore a full 3D workflow by creating a donut model in Blender, adding the sprinkles in Houdini, textures in Substance Painter, and then to exporting the entire thing to Unreal Engine as a game ready asset.
Part 1: Blender
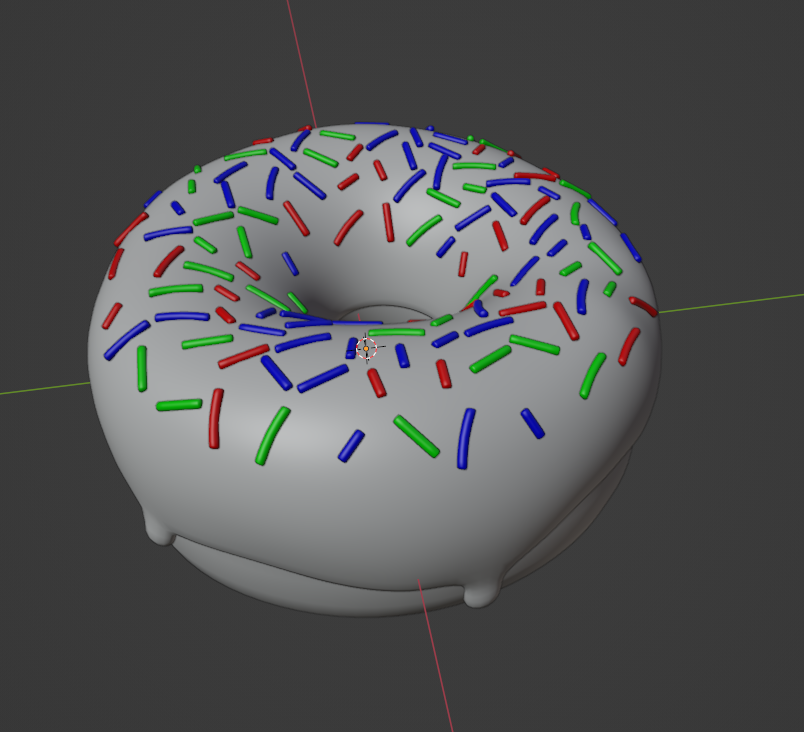
For starters, I created the main donut and the glaze using Blender. I’ll spare you the blow-by-blow for this process: you can check out the Blender Guru Donut Tutorial on YouTube for the details. I followed the modeling videos fairly closely up to the point where I had finished donut and glaze meshes and a few template sprinkles:
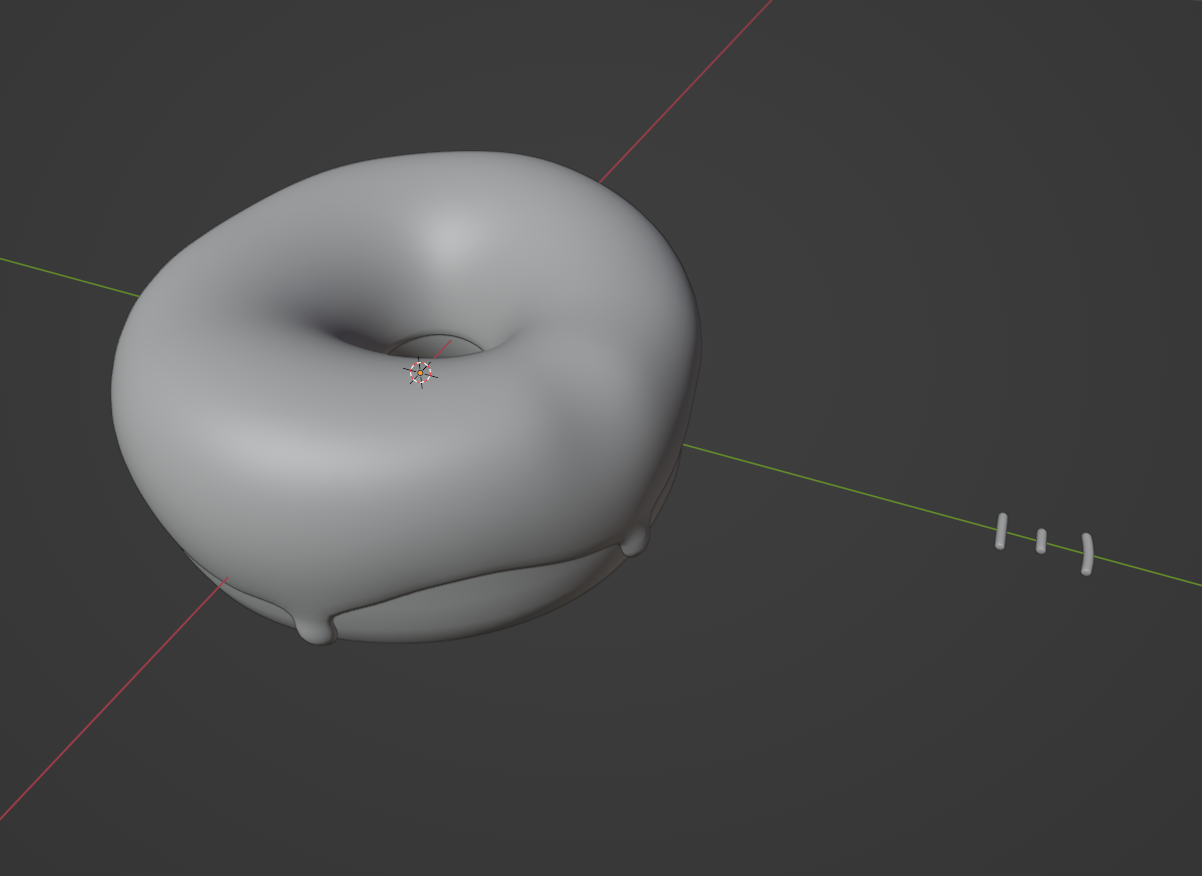
If you wanted to, you could just model these in Houdini itself, but I wanted to understand how to create geometry in a separate program and then distribute that geometry across a surface in Houdini, so I decided to model these out in Blender.
In order to export to Houdini, the main thing you want to do is to make sure that whatever geometry you want separate is actually separated out into different objects in blender. You can separate out your geometry after you export it to Houdini, but I found this is easier to do in Blender.
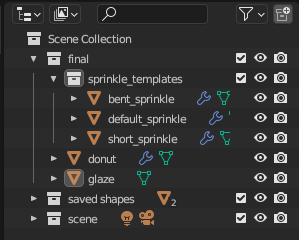
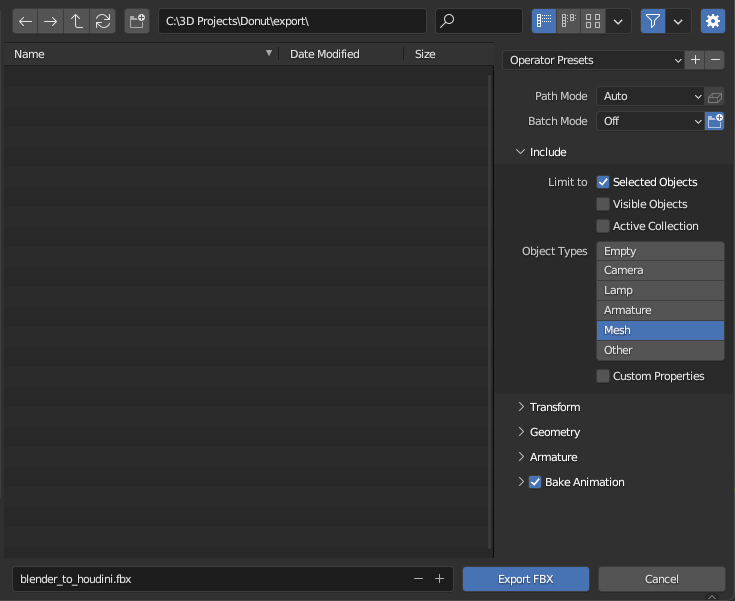
To export this to Houdini, I just used a standard FBX export with the default settings:
Part 2: Houdini
Importing From Blender
In Houdini, I found that there are two ways to import the model, and I want to explain why I think you should pretty much always use one over the other.
Generic Import (bad)
So the first way that you can import the donut with the generic “Geometry” importer. To do this, you go to File->Import->Geometry and find your .fbx file. I found that importing using this method was problematic for two reasons.
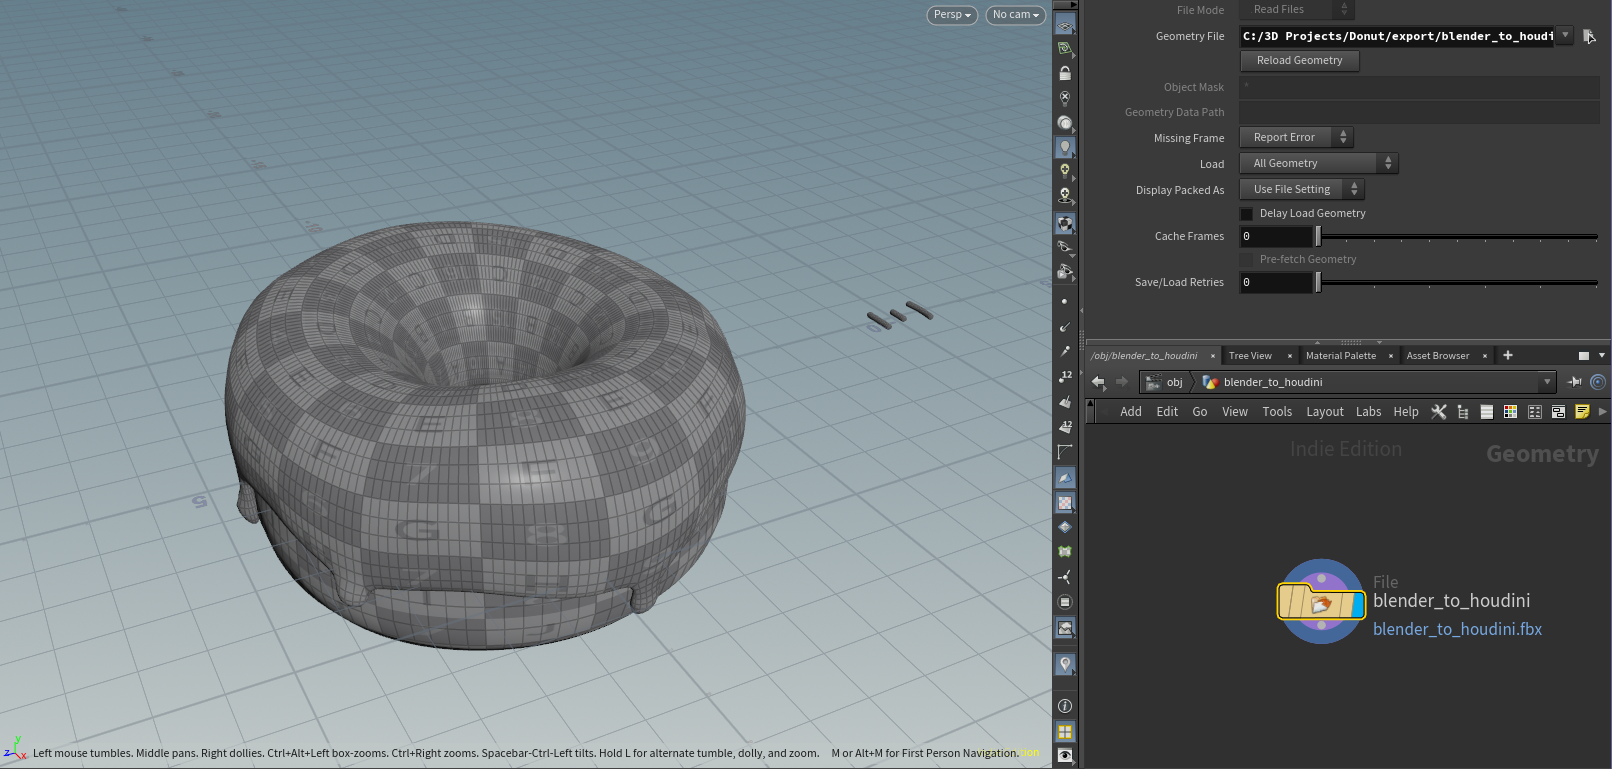
First, if you look at the geometry node, you’ll find that all the geometry data is packed together:
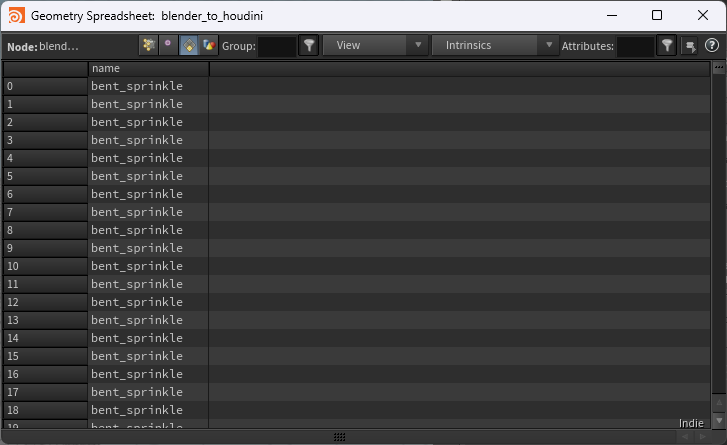
Now this isn’t that big of a deal, because if you look at the spreadsheet you can still separate out the geometry using the name primitive attribute:
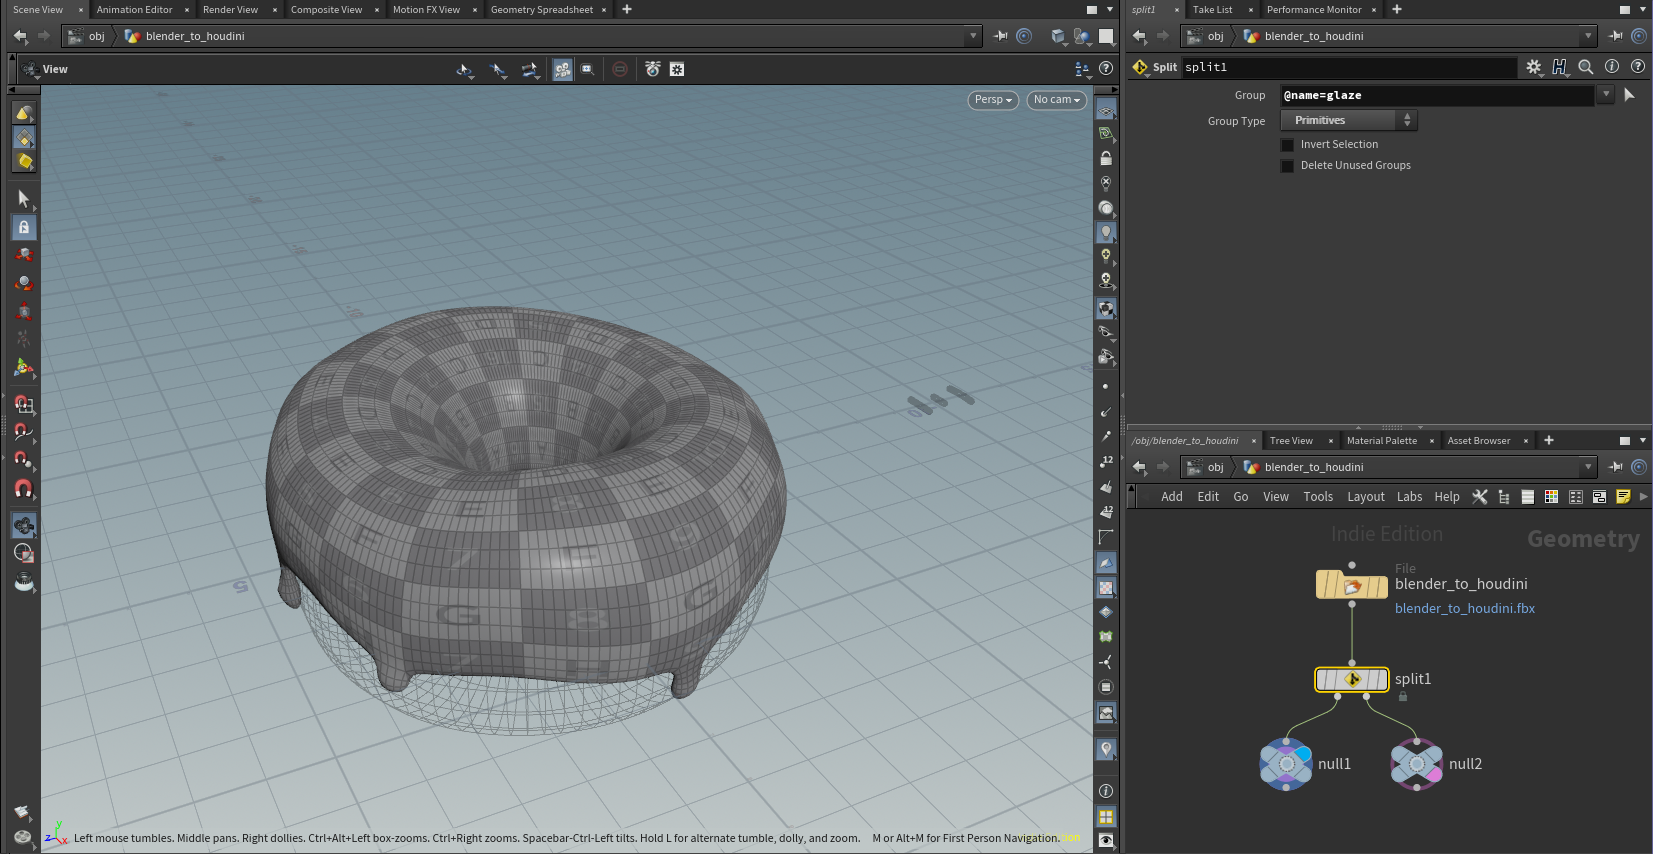
To do this, you can just use a split node, split on the name you want. The left output will be whatever geometry has that name attribute, and the right output will be everything else. To fully split up my geometry, I would need several of these split nodes to separate everything out.
The second reason why the generic geometry import is bad has to do with how scaling works. It turns out that the default unit in Houdini is one meter, but the default unit in Blender is one centimeter. So what happens when you import geometry like this is that if you export it back out to Blender and check the scale of the objects, you’ll find that the scale has been set to .01.
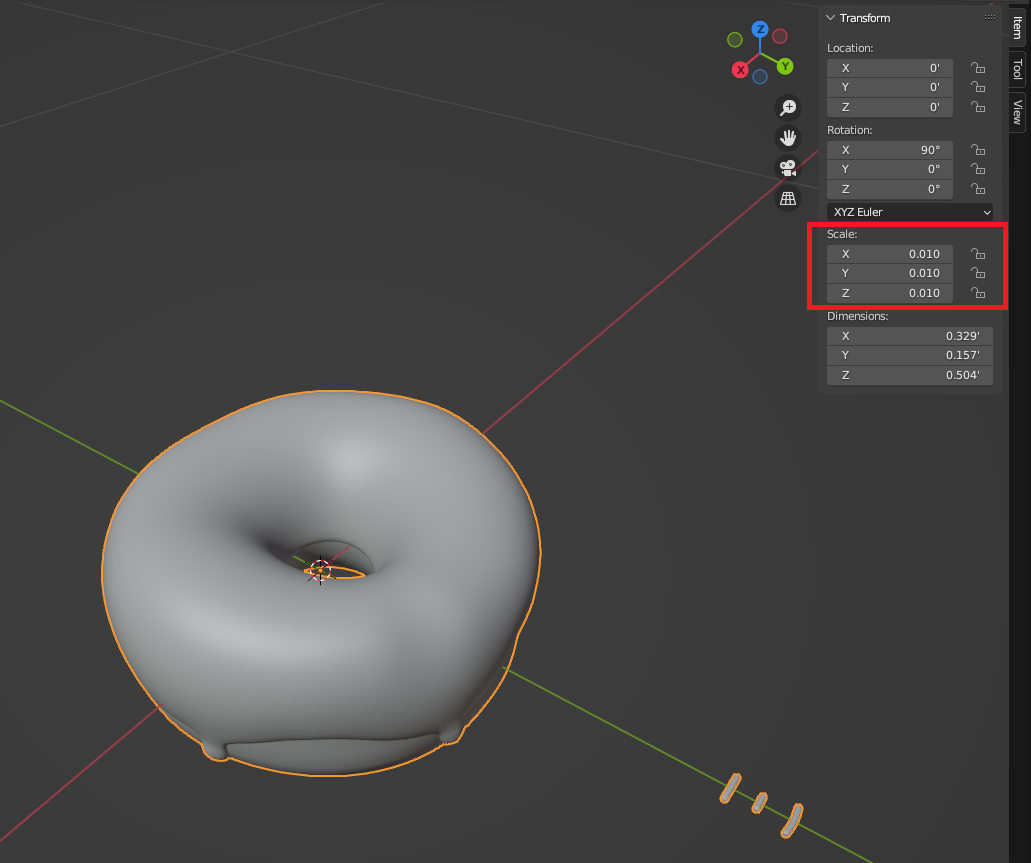
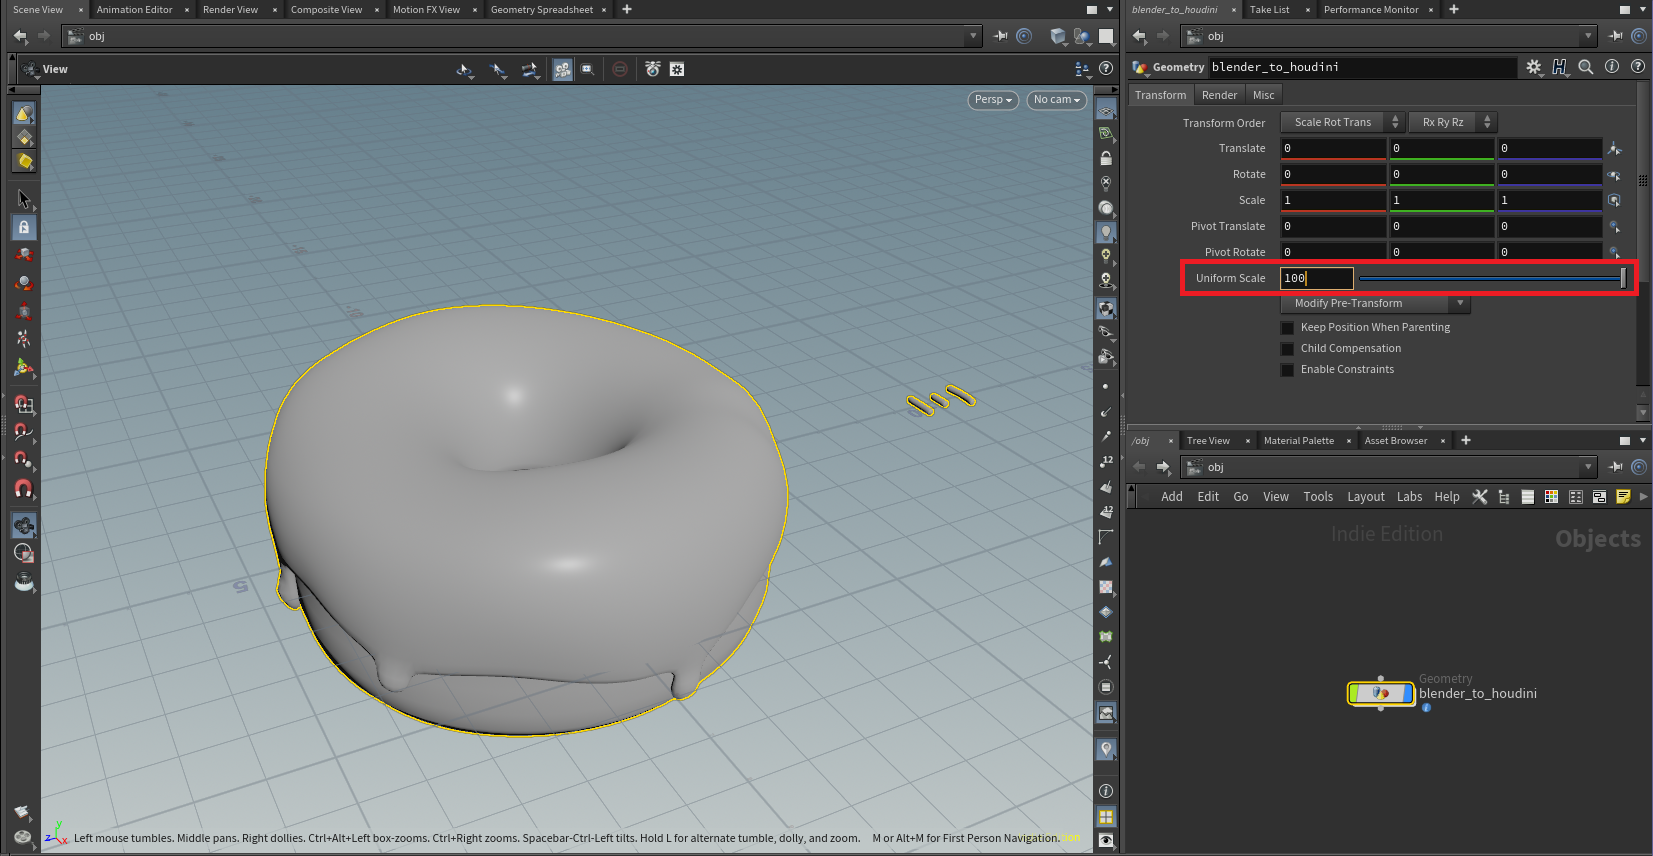
There are a couple ways to deal with this. In Blender you can apply the scale (object->Apply->Scale), and it will revert the scale back to 1.0 without changing the actual size of the geometry. You can also fix this in Houdini by changing the uniform scale of the geometry to 100 before you export it:
I don’t really like either of these fixes though, because you have to remember to do them.
FBX Import (better)
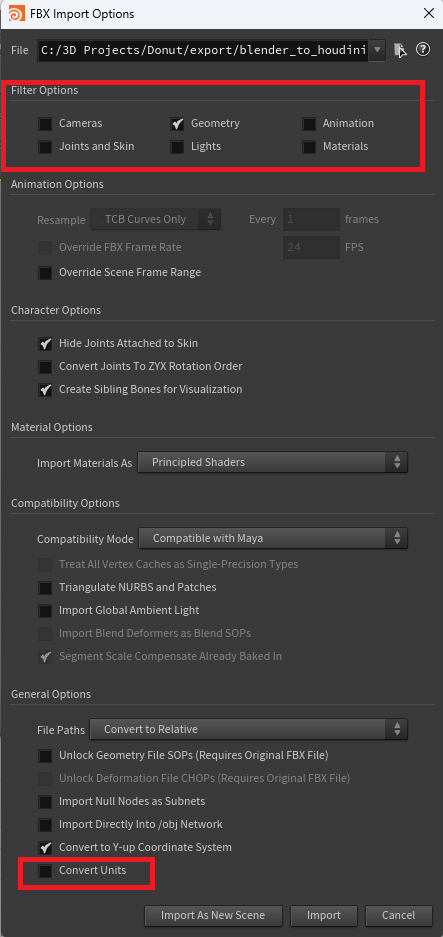
Instead, I found I was able to avoid both the geometry splitting issue and the scaling issue by just using the proper FBX importer. To do this, you go to File->Import->Filmbox FBX, and then in the filter options, uncheck everything except for geometry. Also make sure that the “Convert Units” box is unchecked. If it is checked, you’ll still get the same scale problem if you export the geometry back to Blender.
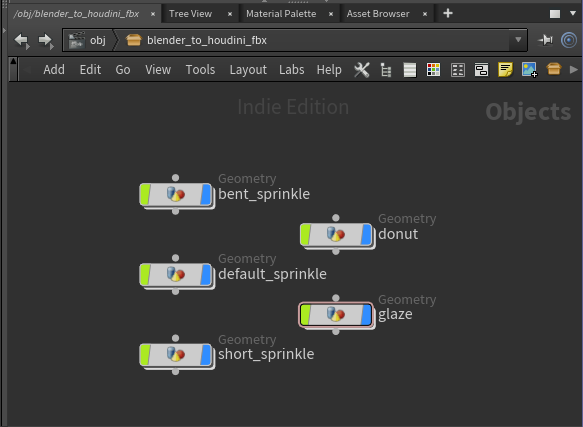
Click import and you’ll get all the objects you had set up in blender automatically separated out:
Generating the Sprinkles
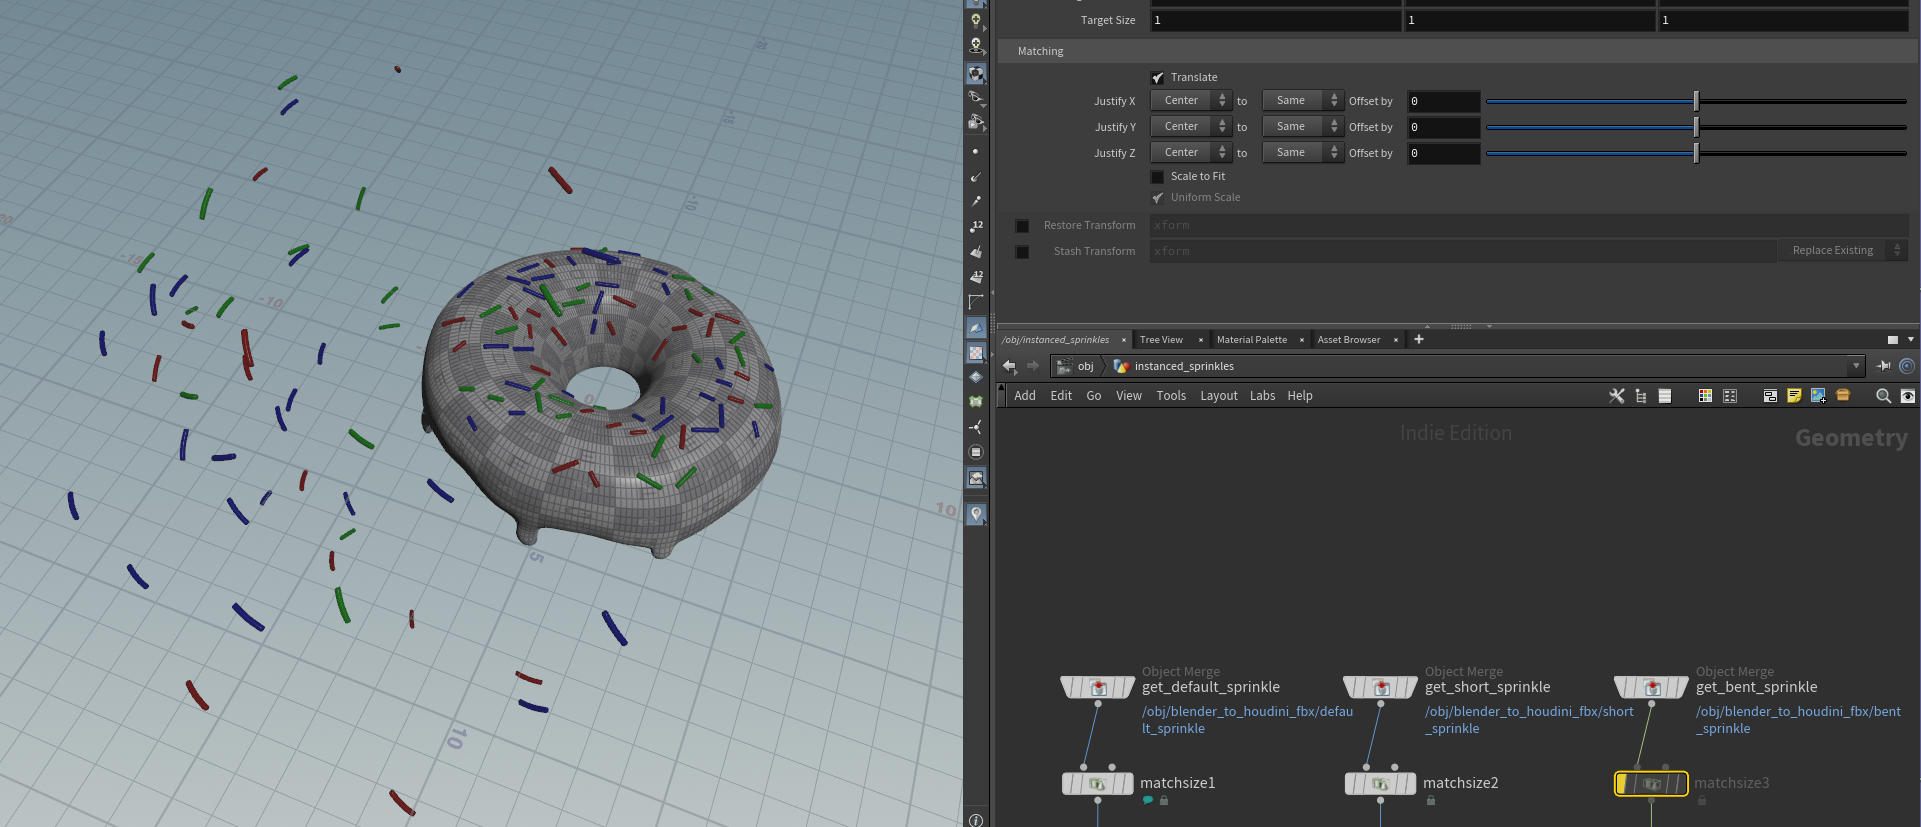
The general strategy for populating these sprinkles is fairly straightforward: generate a bunch of random points on the surface of the donut glaze, then use the copy to points node to distribute the sprinkle template meshes to those points. Before doing that though, I had to do a bit of prep work. First off, I found that if they aren’t already at the origin, the sprinkles need to be moved there. You can do that with a match size node: by default, the target position is 0,0,0 so it should automatically move the sprinkle to the origin when you wire it up.

If you don’t have the sprinkles at the origin, then I think essentially what happens is that whatever the offset exists between the template sprinkle and the origin gets applied to the copied sprinkle as well. So for example if I disable the match size node for the bent sprinkle template, you can see that the positions for all the bent sprinkles have incorrect positions.
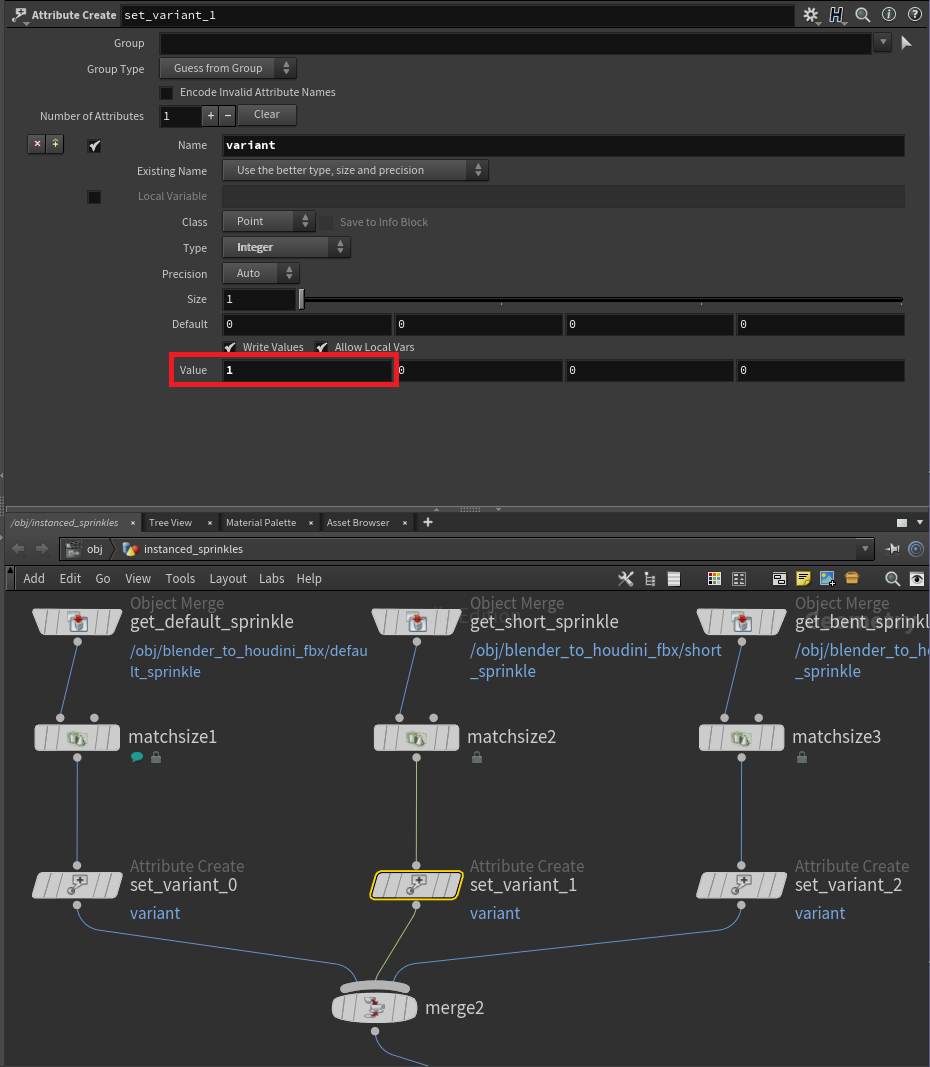
The second piece of prep work was to set a variable that lets the copytopoints node know that I had three different objects I wanted to distribute. copytopoints has this nice “Piece Attribute” feature that basically says “each time you make a copy, pick all the geometry that has the same piece attribute value as the point”. So to label the sprinkles, I just added an attributecreate for each one, and assigned a point integer value to each template sprinkle.
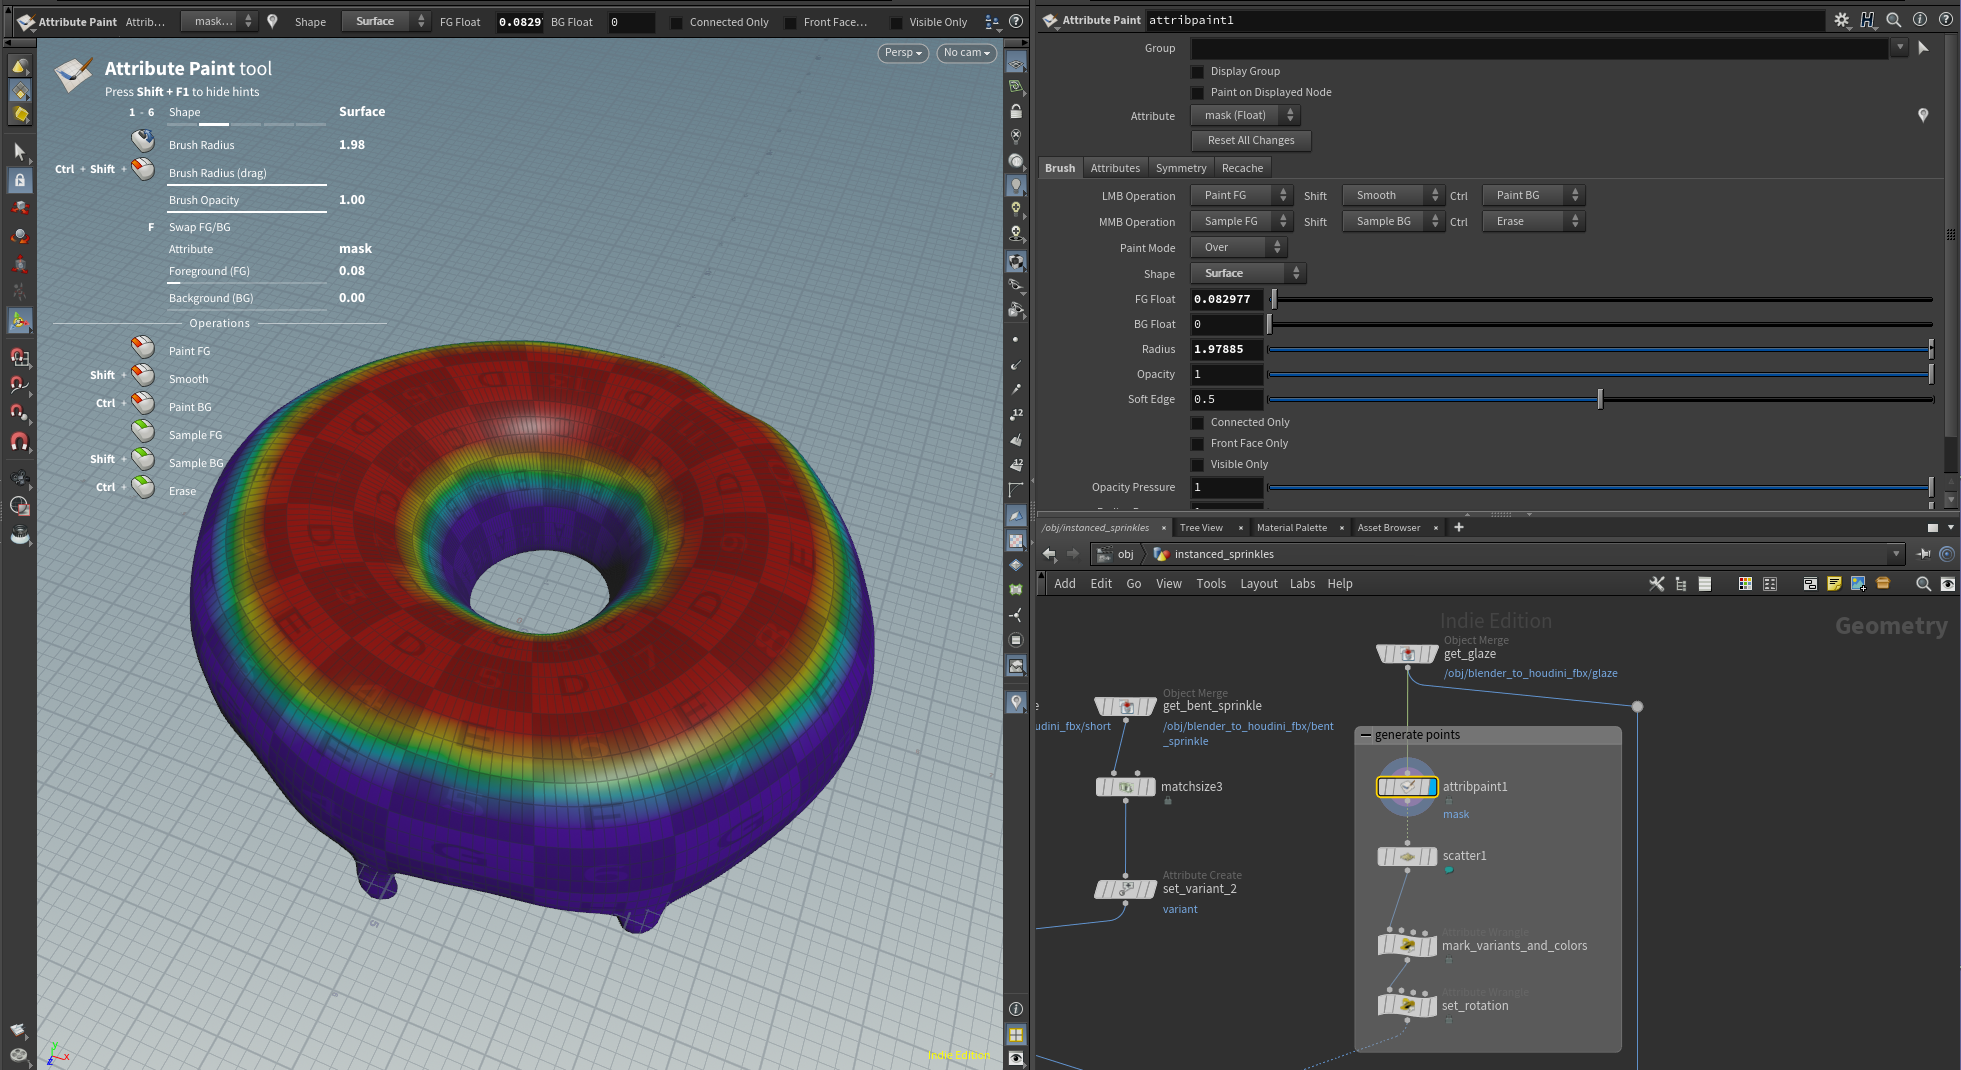
For generating the points, I used an attribute paint node to paint the area where I wanted the sprinkles to appear. I left the attribute name associated with the paint on the default value which is “mask”. This value will get plugged into the density attribute of the next node, so the red area on the top will be the most dense and then there will be less density on the edges of the donut and in the center.
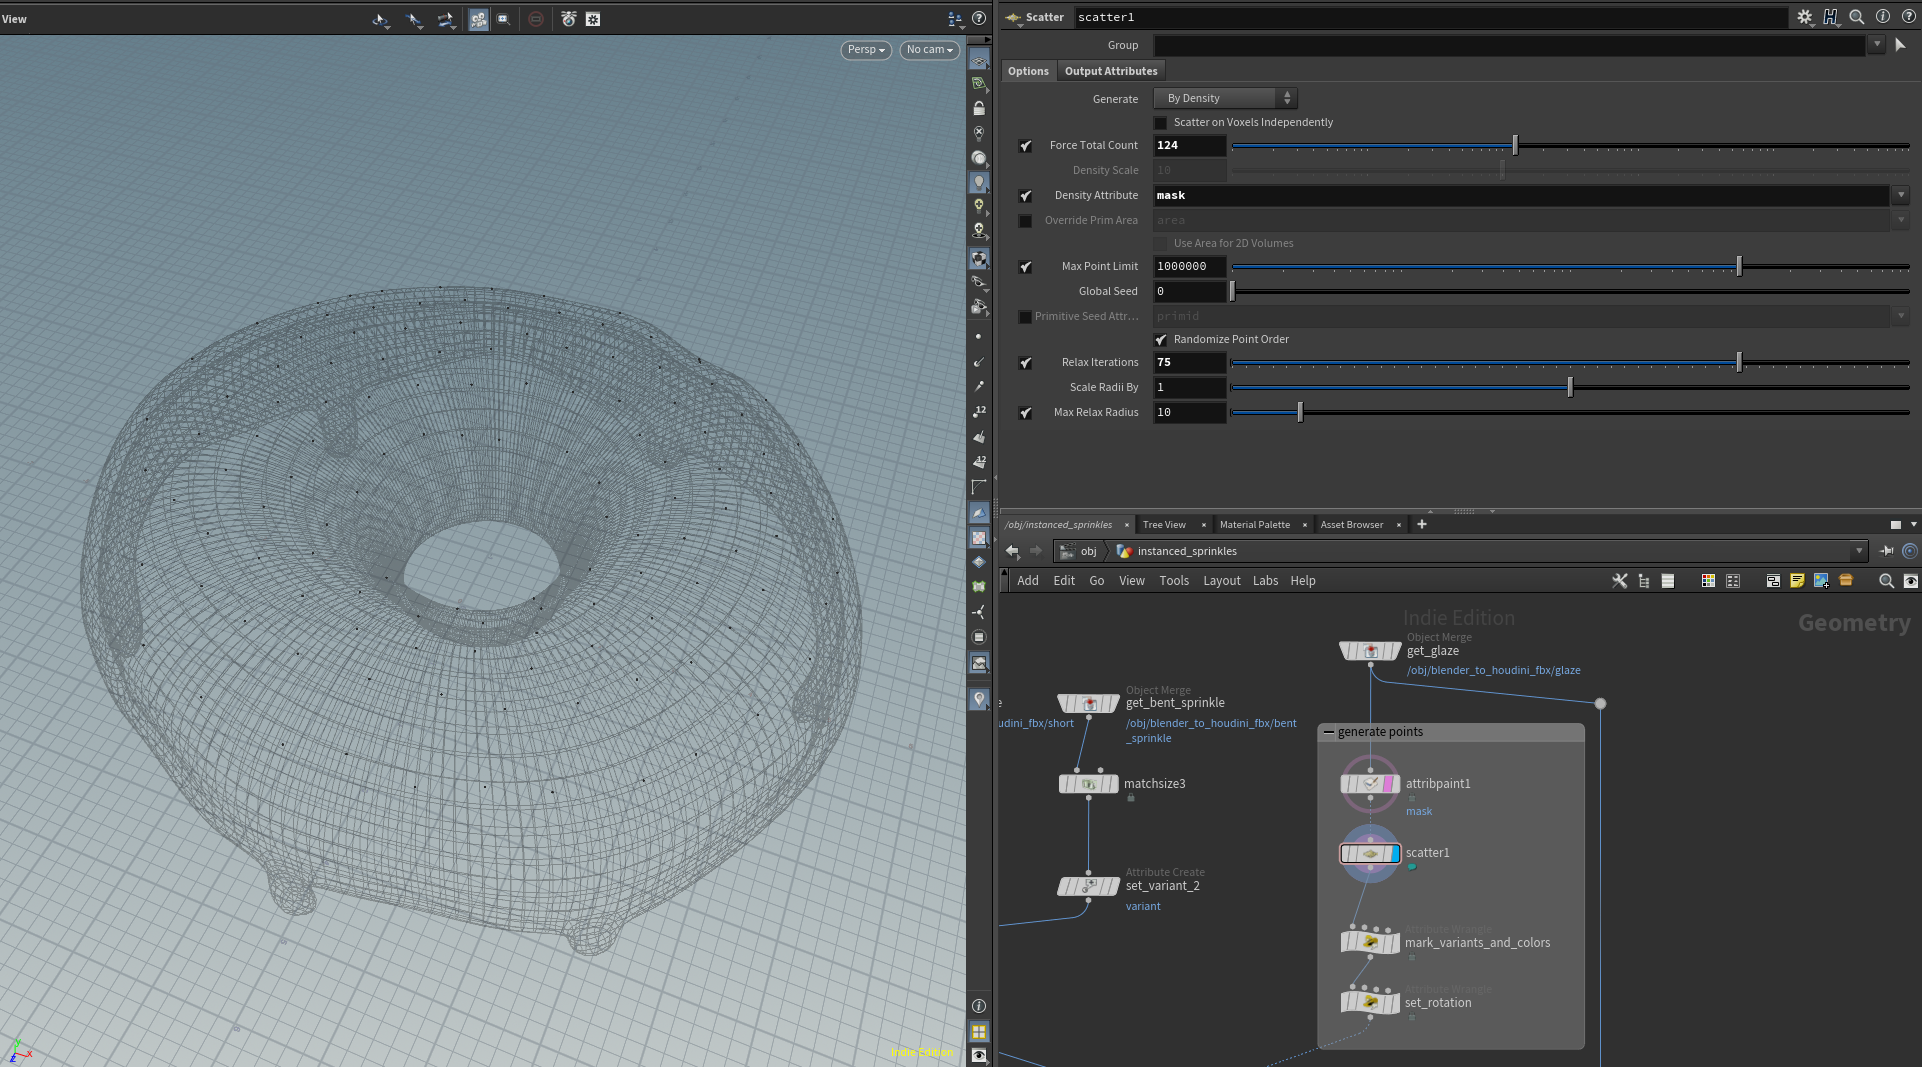
Next, I used a scatter node to place random points across the surface of the glaze. I set the density attribute to the attribute value set by the attribute paint node (“mask”) so that the scatter node would know where to place the points.
Next, I have an attribute wrangle with some VEX code to label each point with a random variant id (which determines which sprinkle type it will be) and also a random vertex color. The purpose of the vertex color is to tell Substance Painter which sprinkles should have the same material applied to them.
// mark_variants_and_colors

// Create an integer called variant and set it to a random value from 0 to number_of_variants - 1.
i@variant = floor(rand(@ptnum)*chi("number_of_variants"));

int color_id = floor(rand(@ptnum + chi("color_seed")) * 3);
if (color_id == 0)
{
    v@Cd = {1.0,0.0,0.0};
}
else if (color_id == 1)
{
    v@Cd = {0.0,1.0,0.0};
}
else if (color_id == 2)
{
    v@Cd = {0.0,0.0,1.0};
}
I use a second attribute wrangle for giving each sprinkle a random rotation. I also have some additional VEX code to rotate the bent sprinkles a bit so that they look more natural on the surface of the donut.
// set_rotation

// First, we need to set the starting value for p@orient.
// This is done by grabbing the N (Z alignmnet) and UP (y alignment) values and converting them to a quat.
v@up = {0,0,1};
matrix3 m = maketransform(v@N,v@up);
p@orient = quaternion(m);

// Now we create a rotation quat. The roation is about the Z axis because normals are aligned to Z.
vector4 rotation_quat = quaternion(rand(@ptnum)*2*$PI,{0,0,1});
p@orient = qmultiply(p@orient, rotation_quat);

// fix the rotation of the bent sprinkle. Without this, the bent sprinkles are all bent down towards the donut.
if(@variant == 2)
{
  float rotation_fix_deg = chf("bent_sprinkle_rotation");
  vector4 rotation_fix_quat = quaternion(radians(rotation_fix_deg),{1,0,0});
  p@orient = qmultiply(p@orient, rotation_fix_quat);
}
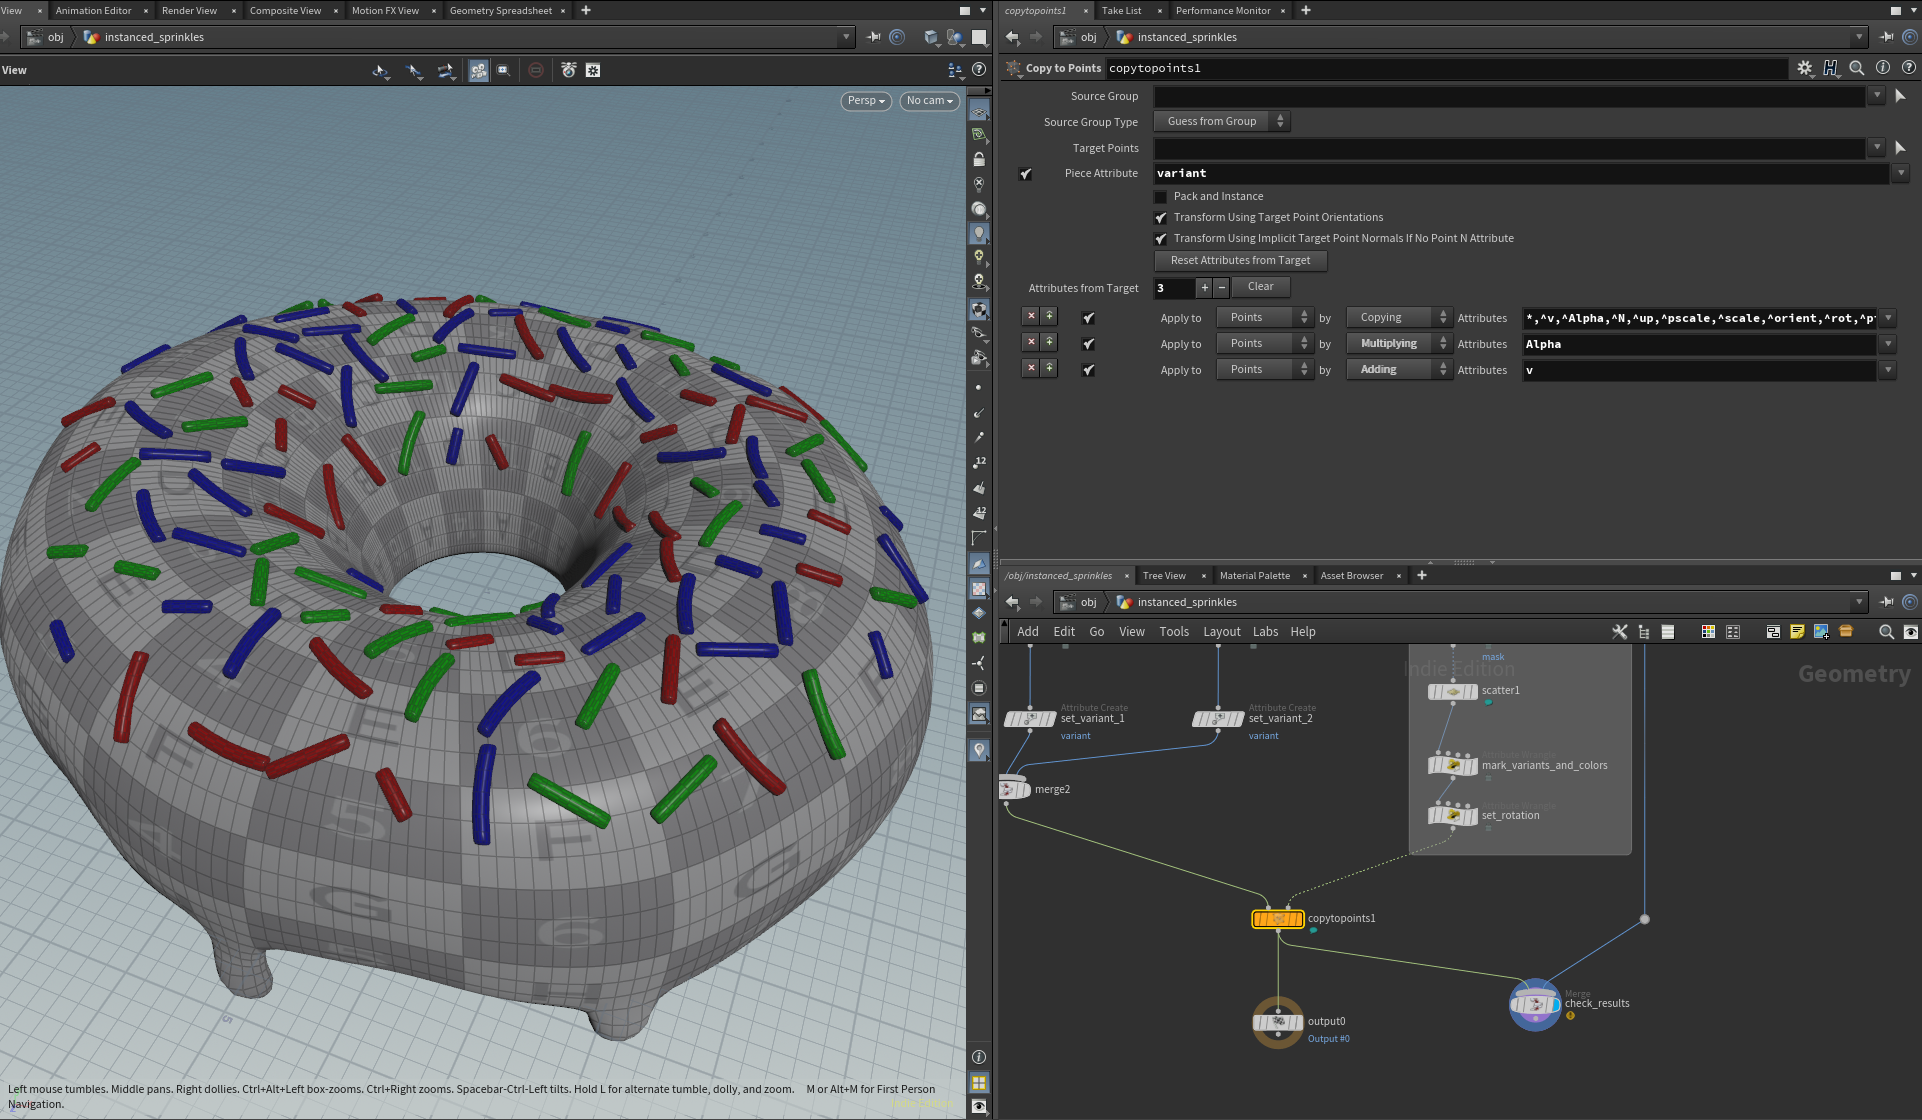
Putting it all together, I used copytopoints to distribute the sprinkles- using the “piece attribute” to enforce that only one sprinkle type is copied per point. Finally I merged the results with the glaze mesh to make sure everything looked good.
Part 3: Blender Cleanup
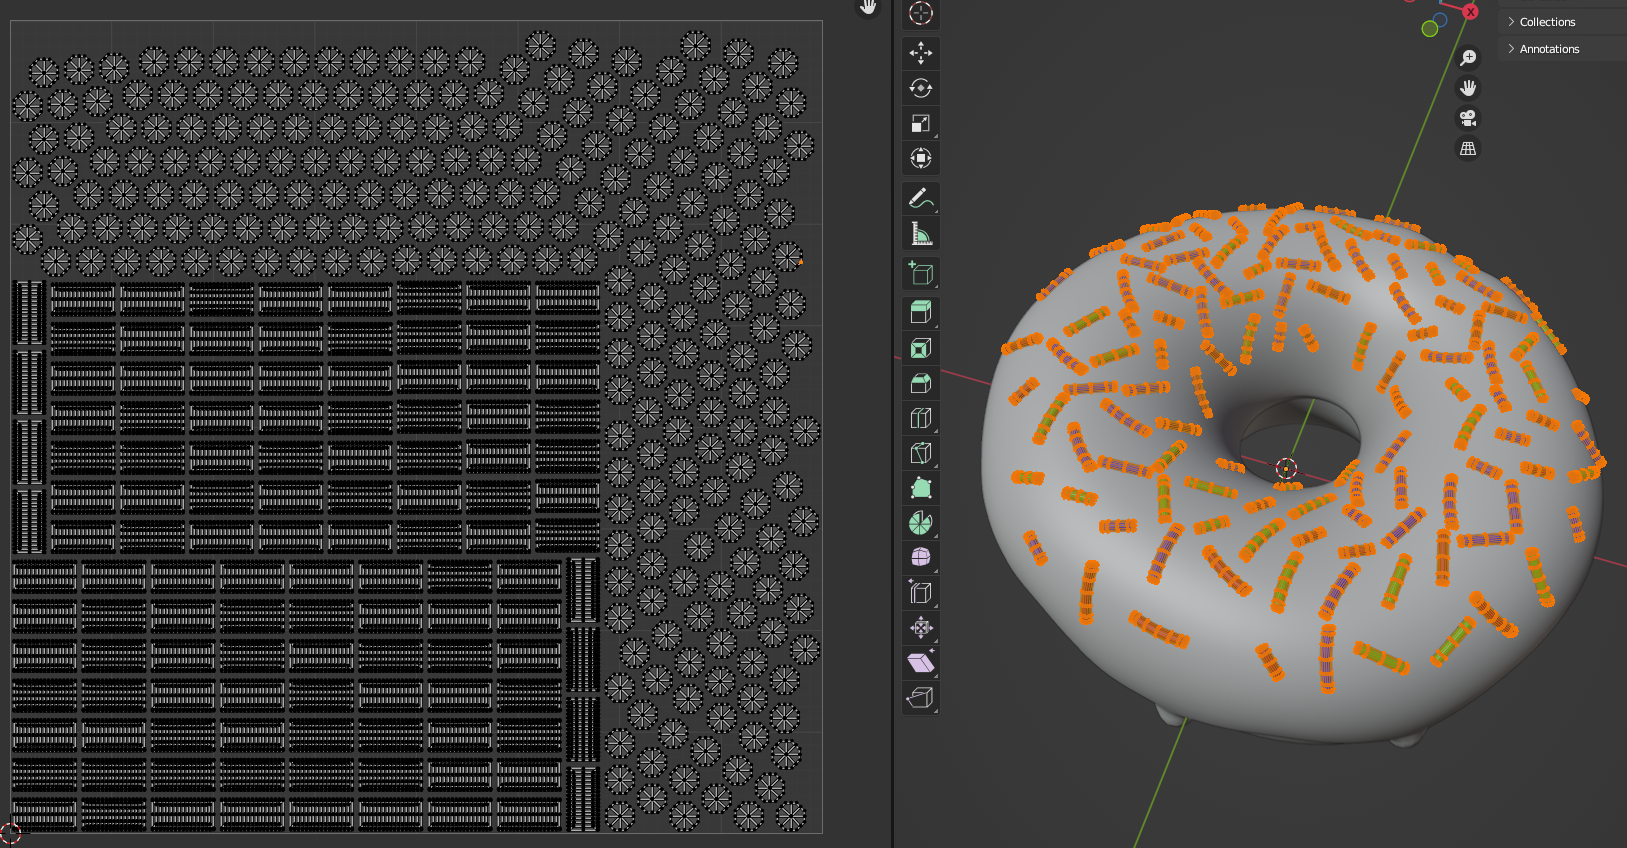
With the sprinkles done, I exported them back out to blender and did a little manual cleanup to remove any sprinkles that were still overlapping. Additionally, I unwrapped the UVs in preparation for substance painter.
One caveat with the way I generated the sprinkles is that each sprinkle needs its own UV island since the colors are randomized across the three shapes. In the future, it might be worth looking into a way to stack the UVs by both shape AND vertex color, so as to save on texture space. For this project though, I did not care about texture optimization, so I just used separate UVs for the sprinkles, glaze, and donut meshes.
Part 4: Substance Painter
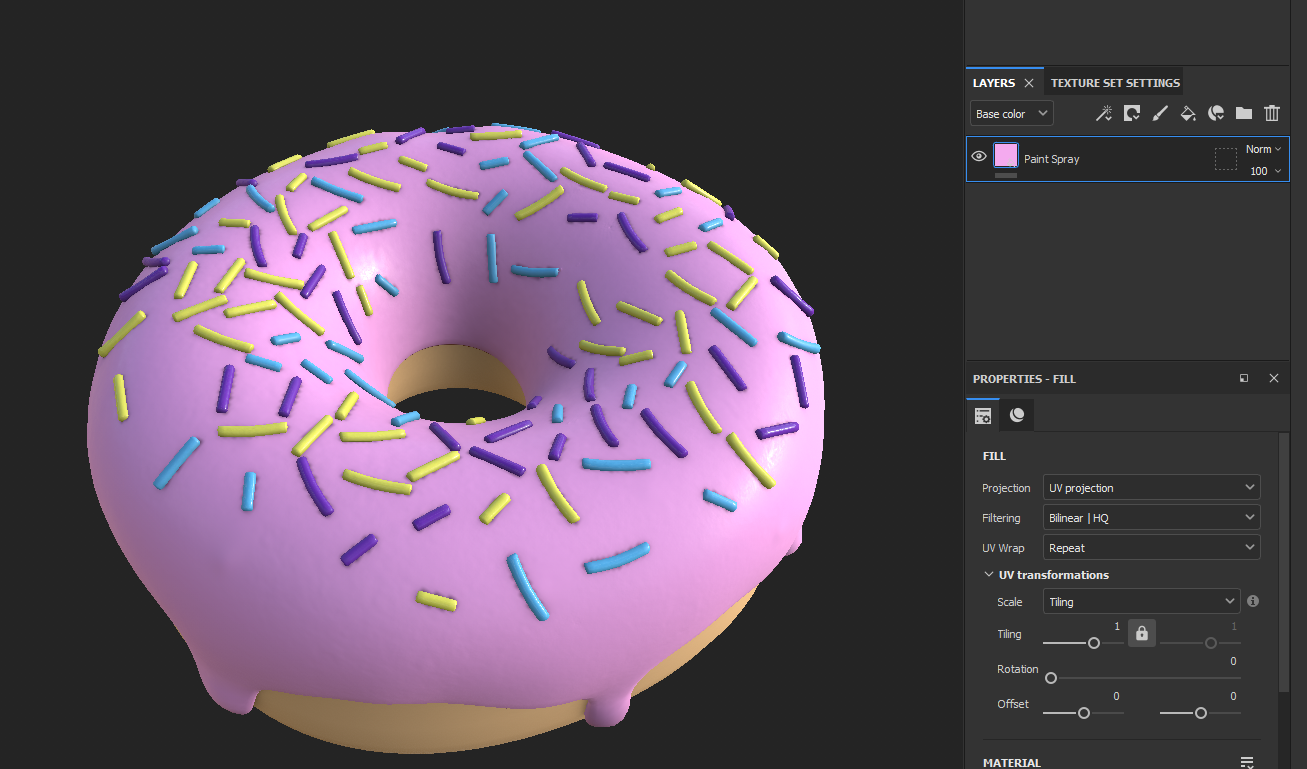
With the cleanup finished, I exported everything to substance painter. For this step, I didn’t spend too much time with applying textures to the model: I mostly just threw on some default materials and called it a day. In the future, I will plan on learning Substance at a deeper level.
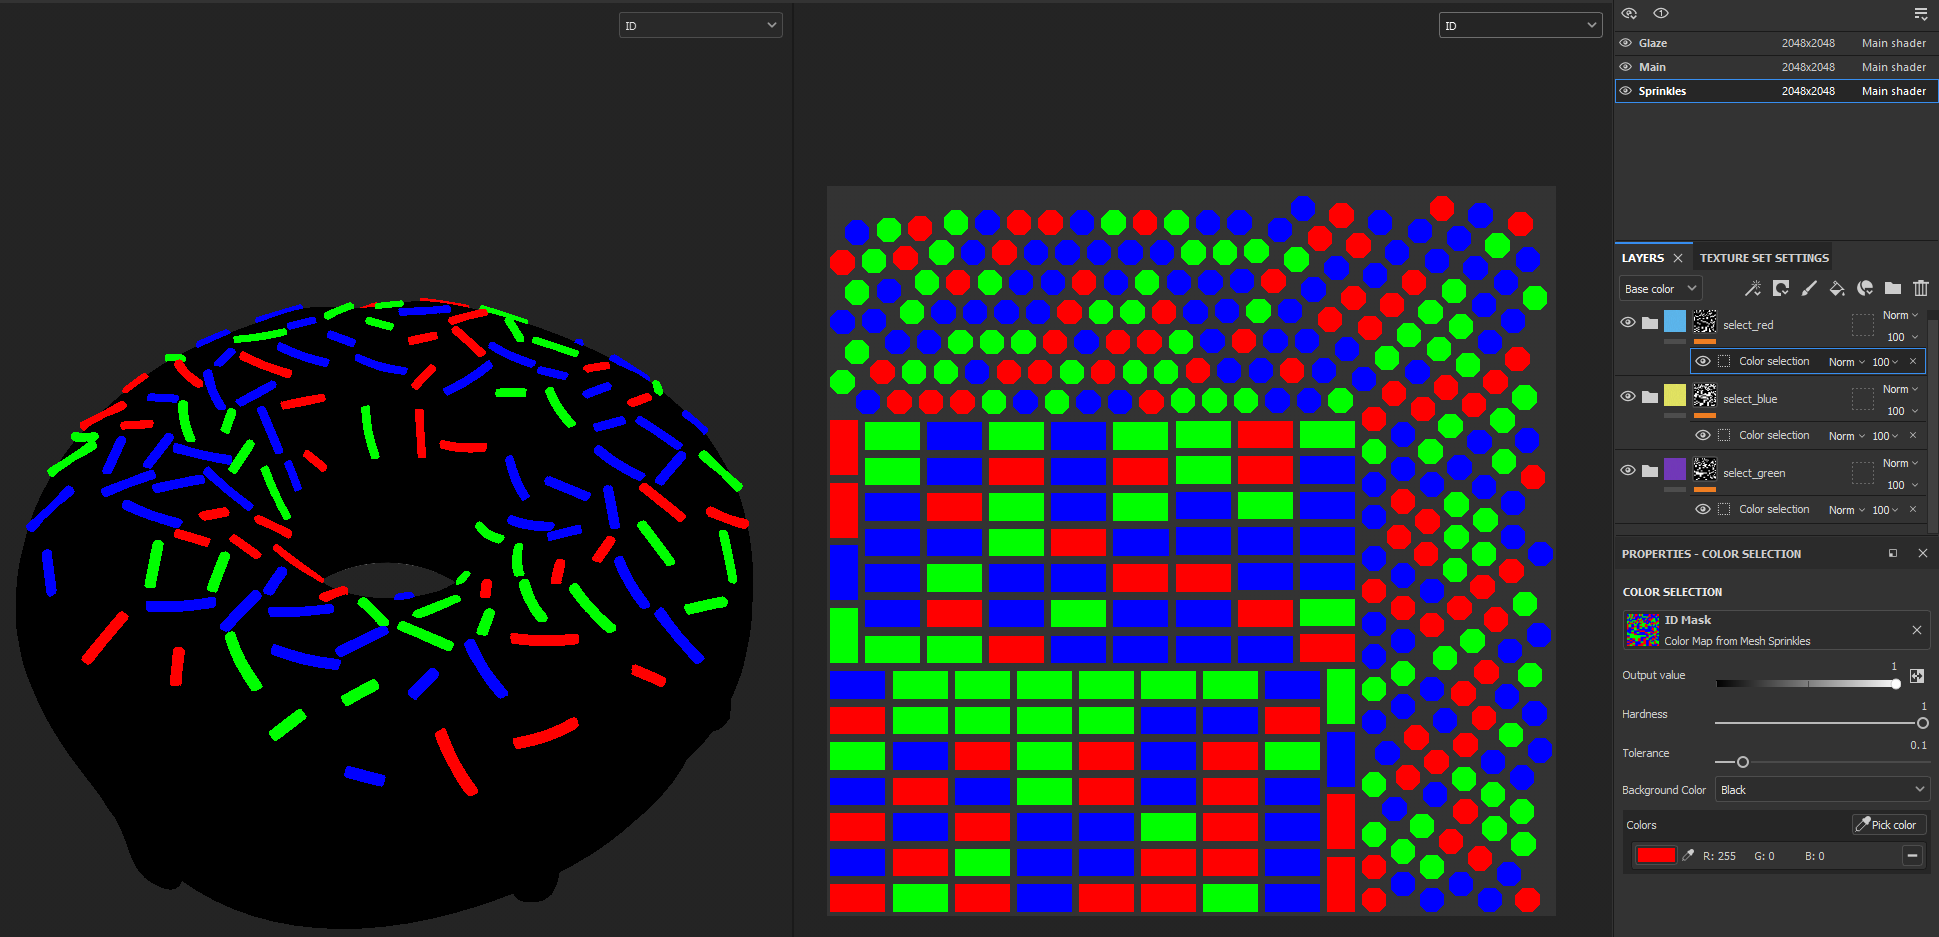
One interesting thing to call out here is how Substance uses the vertex colors. When you bake in Substance Painter, you can bake out an ID map using using “vertex color” as the Color Source:
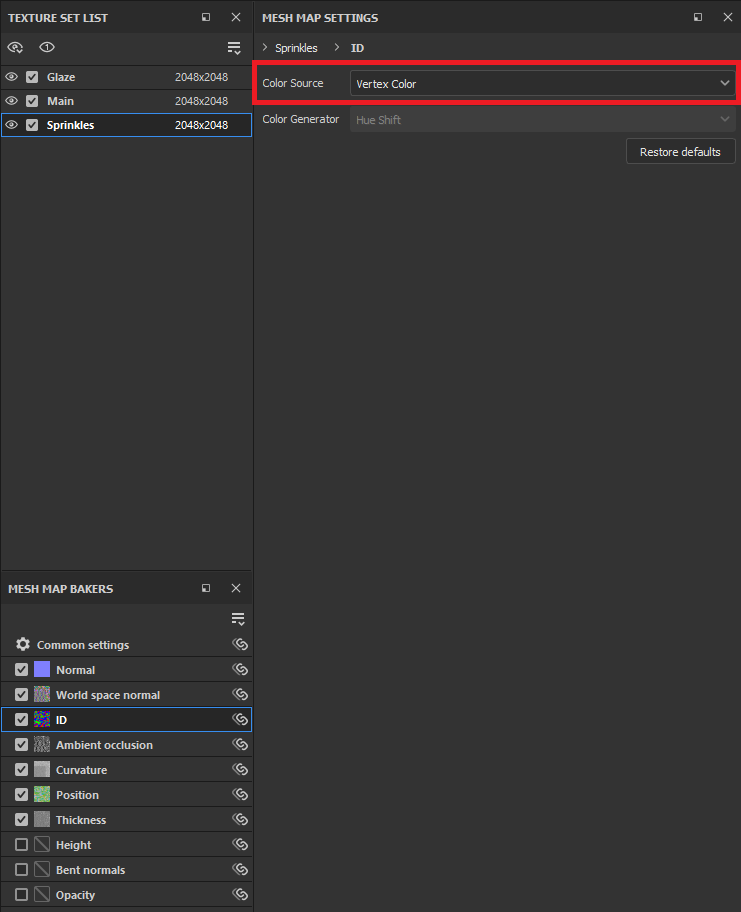
Then, in paint mode you can specify a color selection and filter by your vertex colors. This is how substance knows which sprinkle should get which material.
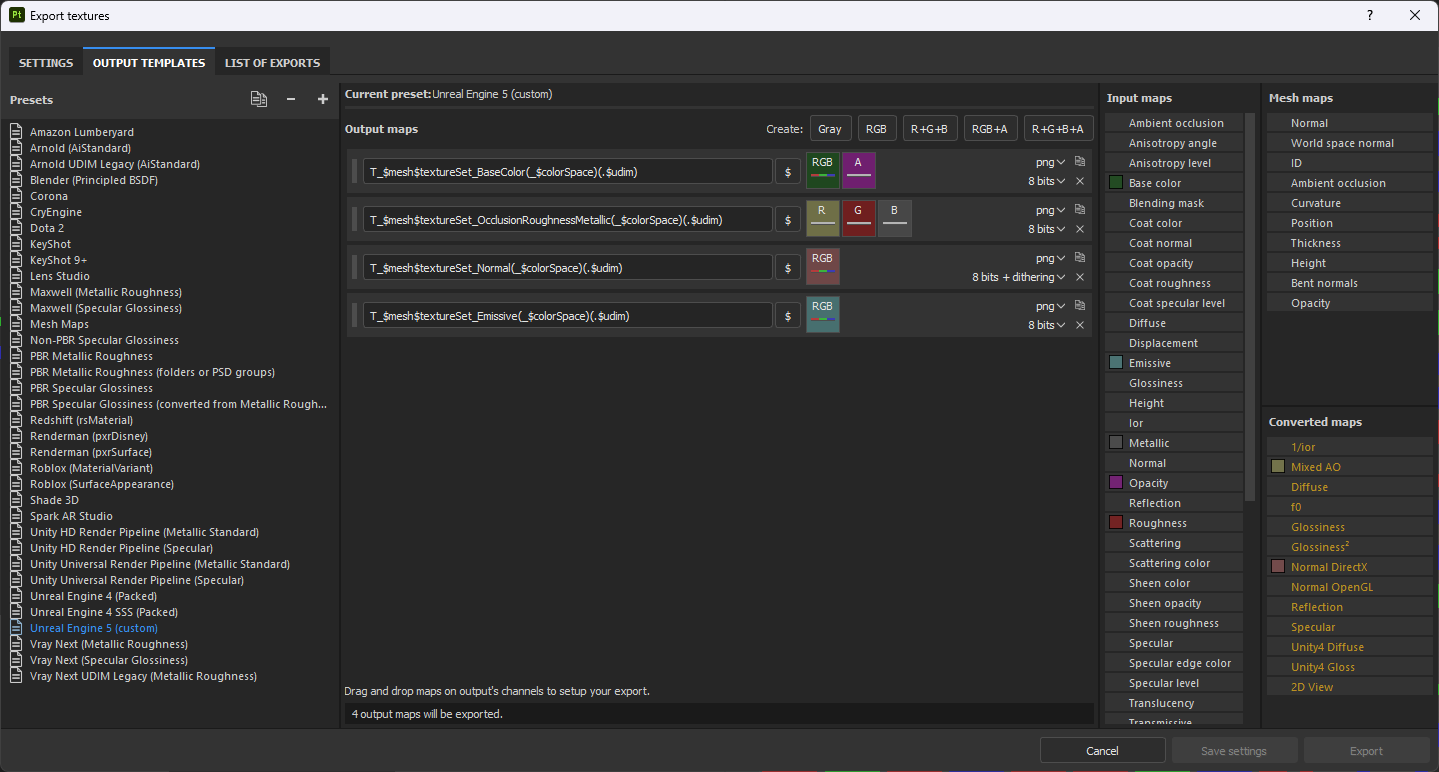
One other thing I did in Substance was to create my own Unreal Engine output template, so that each texture map would have the correct T_ naming convention applied by default when I imported them into the UE editor:
Part 5: Unreal Engine
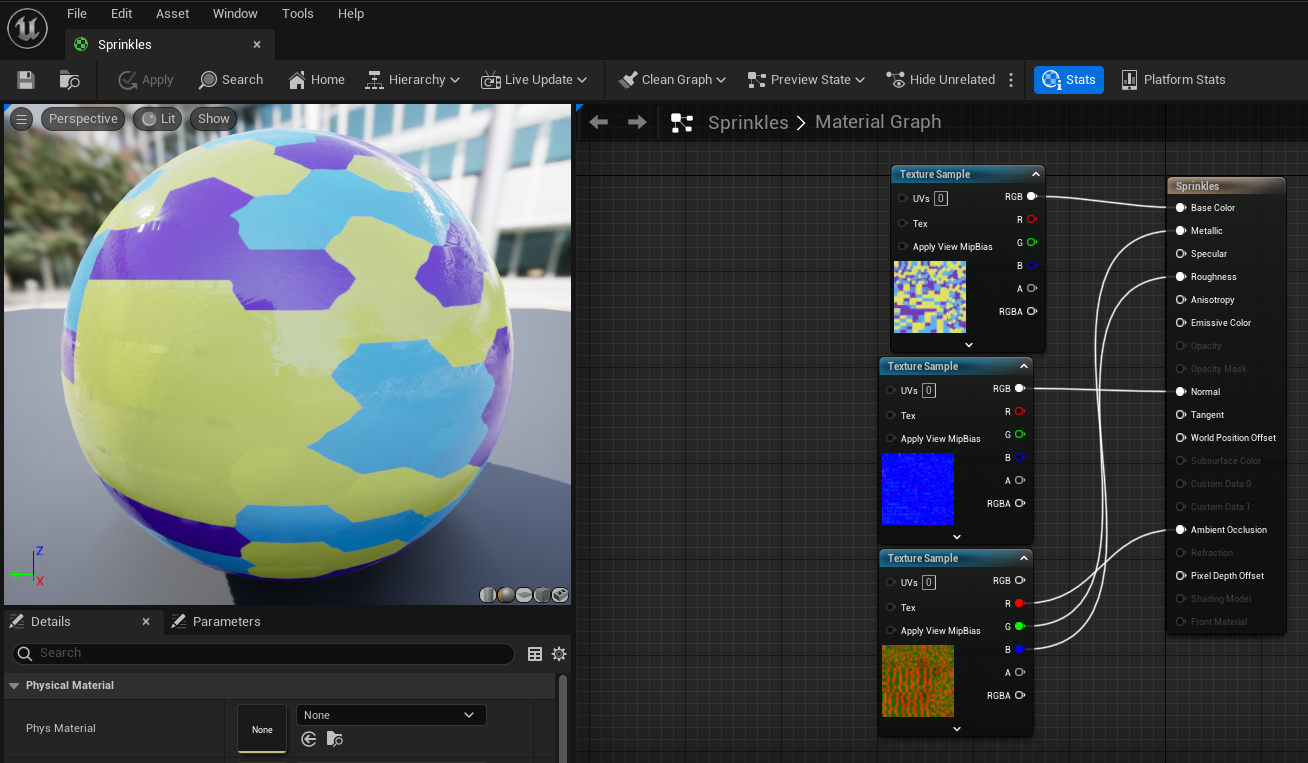
After exporting the textures from Substance Painter, I imported the mesh and the textures into Unreal Engine. For each material I created in Substance, I created a complementary material in Unreal and plugged in the _BaseColor, _OcclusionRoughnessMetallic, and _Normal textures into the appropriate slots in the material graph editor.
Here is the final result:
